See Basic Divi Theme Options Guide in its original habitat on The Only Place for Greensboro SEO Strategy or read the entire post below
When you're new to Divi, the Theme Options can be a little overwhelming. Luckily, they don't contain anything too tricky. Some concern design. Others deal with integrations, the WordPress backend, or other important areas. But none of them require an expert. In this Divi Theme Options Guide, we'll try to make it as easy as possible. Simply steal our settings and go.
Divi Theme Options
Divi offers pretty much everything a webmaster needs. Depending on what you want to do with your website, you may need to adjust your settings. Here, we'll assume you've already installed WordPress, edited your WordPress settings, installed Divi, and are ready to begin to designing your site. You can also use this to check against a site you already have but it's always better to get it right before you begin. We always recommend checking these twice.General
Divi General Settings are fairly basic. This is where you find social media profiles, date format, and other basic options. It’s also where you choose which colors you would like in your custom color palette. Aside from these, the most important thing to do here is to add your logo so that it appears in the menu bar. Go to Divi >>> Theme Options. Copy these settings: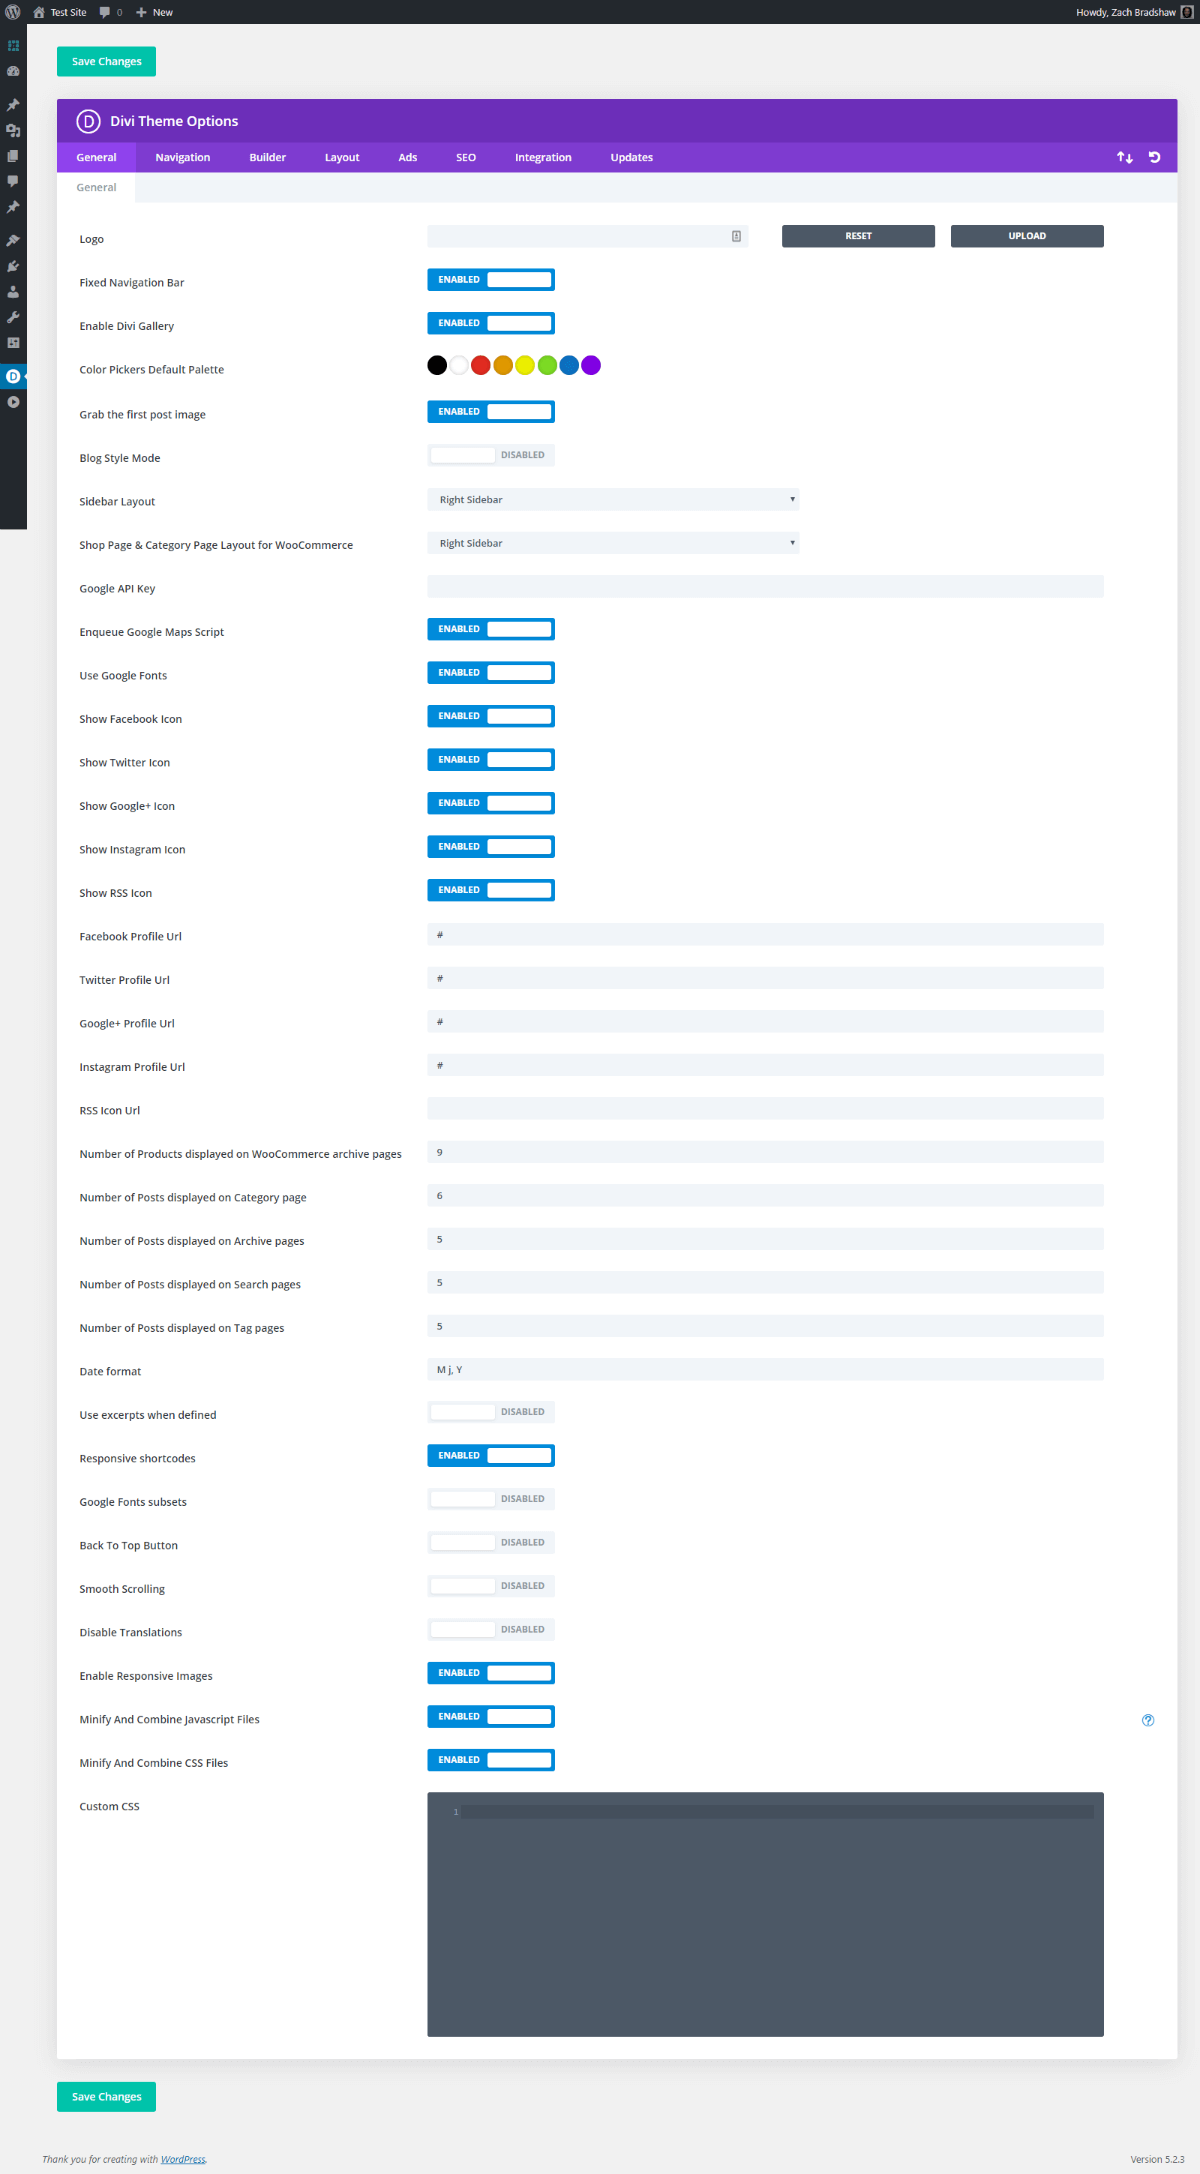 If you'd like more detail:
Divi General Theme Options Overview
- Set Logo - Add your logo. It will appear in the menu bar based on your Customizer settings.
- Set Fixed Navigation Bar - Enable for a sticky menu bar that remains visible as users scroll.
- Set Enable Divi Gallery - Enable for the ability to add Divi's gallery to content in Classic Editor.
- Set Color Pickers Default Palette - Set your default color palette. Reflected in Divi Builder.
- Set Grab the first post image - Enable to use the first image as the featured image if none set.
- Set Blog Style Mode - Disable to use post excerpts on archive pages. Enable for full posts.
- Set Sidebar Layout - Choose Right Sidebar for the default blog look. Can edit per page/post.
- Set Shop Page & Category... - Choose Right Sidebar for default shop look with WooCommerce.
- Set Google API Key - Add your Google API key for proper functioning of Divi Maps Modules.
- Set Enqueue Google Maps Script - Enable for proper functioning of Divi Maps Modules.
- Set Use Google Fonts - Enable to use the Google Fonts libraries within the Divi Builder.
- Set Show Facebook Icon - Enable to display the Facebook icon in Divi's top and bottom bars.
- Set Show Twitter Icon - Enable to display the Twitter icon in Divi's top and bottom bars.
- Set Show Google+ Icon - Enable to display the Google+ icon in Divi's top and bottom bars.
- Set Show Instagram Icon - Enable to display the Instagram icon in Divi's top and bottom bars.
- Set Show RSS Icon - Enable to display the RSS feed icon in Divi's top and bottom bars.
- Set Facebook Profile URL - Add your Facebook Page URL for top and bottom bar links.
- Set Twitter Profile URL - Add your Twitter Profile URL for top and bottom bar links.
- Set Google+ Profile URL - Add your Google Maps Page URL for top and bottom bar links.
- Set Instagram Profile URL - Add your Instagram Profile URL for top and bottom bar links.
- Set RSS Icon URL - Add your preferred RSS feed URL for top and bottom bar links.
- Set Number of Products... Archive... - Enter a "9" or your preferred number of products.
- Set Number of Posts... Category... - Enter a "6" or your preferred number of posts.
- Set Number of Posts... Archive... - Enter a "5 or your preferred number of posts.
- Set Number of Posts... Search... - Enter a "5" or your preferred number of posts.
- Set Number of Posts... Tag... - Enter a "5" or your preferred number of posts.
- Set Date format - Enter "M j, Y" or your preferred date format based on the WP codex.
- Set Use excerpts when defined - Disable the use of excerpts unless you use them.
- Set Responsive shortcodes - Enable to make shortcodes respond to various screen sizes.
- Set Google Fonts subsets - Disable unless you need Google's Non-English font library.
- Set Back to Top Button - Disable Back to Top unless you prefer it with your design.
- Set Smooth Scrolling - Disable Smooth Scrolling unless you prefer it with your design.
- Set Disable Translations - Disable unless you need translated theme strings on your site.
- Set Enable Responsive Images - Enable responsive image sizes for better page performance.
- Set Minify & Combine Javascript Files - Enable this option to speed up your site's page load.***
- Set Minify & Combine CSS Files - Enable this option to speed up your site's page load.***
- Set Custom CSS - Add your custom CSS to Divi here. Also available in Theme Customizer.
Navigation
Divi Navigation Settings are also basic. We prefer to customize our menu elsewhere in WordPress. But a quick run through is always smart. Plus, you might even find that some of these options suit your needs. For example, you could use these options to automate menu updates or optimize your one page website design. Go to Navigation >>> Pages. Copy these settings: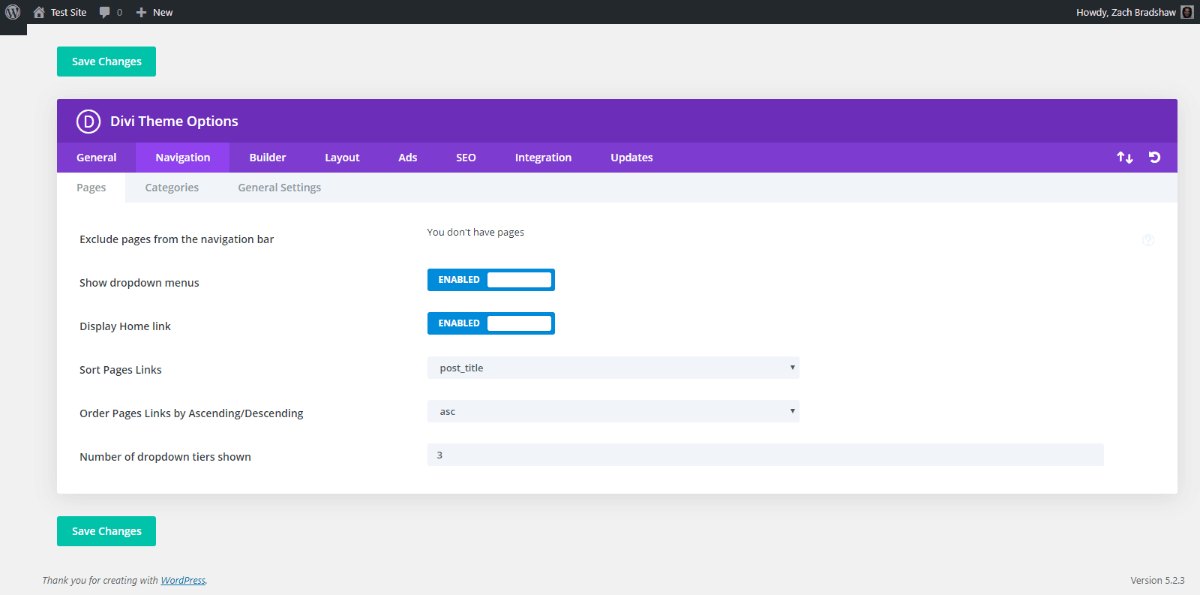 If you'd like more detail:
Divi Pages Navigation Theme Options Overview
- Set Exclude pages from the... - Edit your menu here if you aren't using default WP menus.
- Set Show dropdown menus - Enable the use of dropdown menus on the navigation bar.
- Set Display Home link - Enable your home page link if you aren't using default WP menus.
- Set Sort Pages Links - Choose "post_title" or your preferred navigation sorting variable.
- Set Order Pages Links by... - Choose "asc" or your preferred navigation sorting order.
- Set Number of dropdown tiers... - Enter "3" dropdown tiers or your preferred number.
 If you'd like more detail:
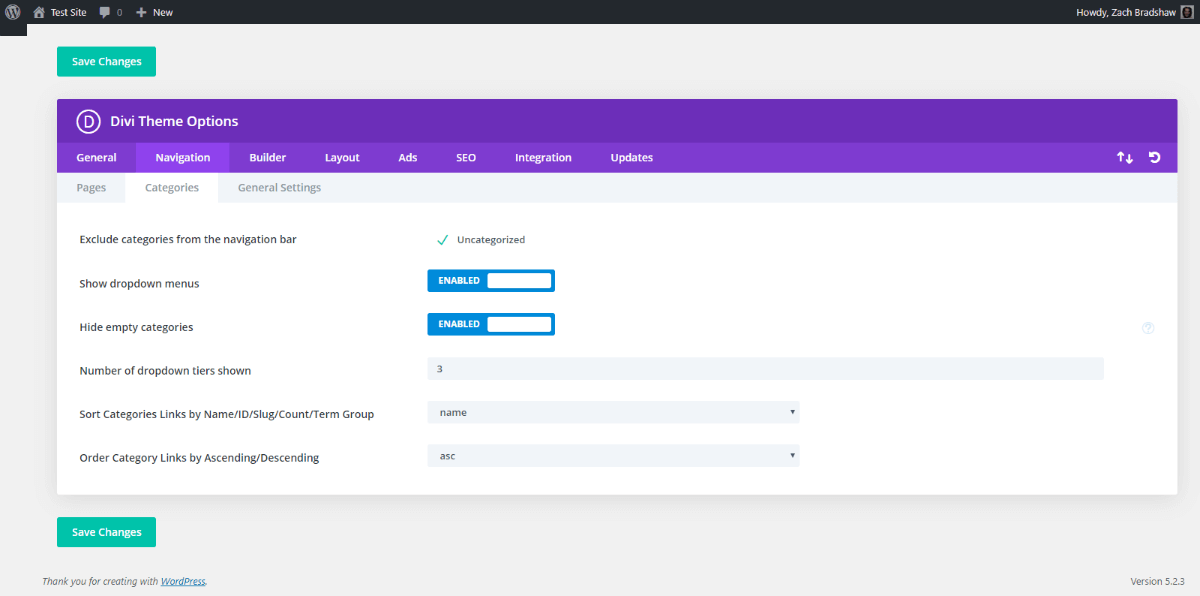
Divi Categories Navigation Theme Options Overview
- Set Exclude categories from the... - Edit your menu here if you aren't using default WP menus.
- Set Show dropdown menus - Enable the use of dropdown menus on the navigation bar.
- Set Hide empty categories - Enable this to hide categories that do not have posts in them.
- Set Number of dropdown tiers... - Enter "3" dropdown tiers or your preferred number.
- Set Sort Categories Links... - Choose "name" or your preferred navigation sorting variable.
- Set Order Category Links... - Choose "asc" or your preferred navigation sorting order.
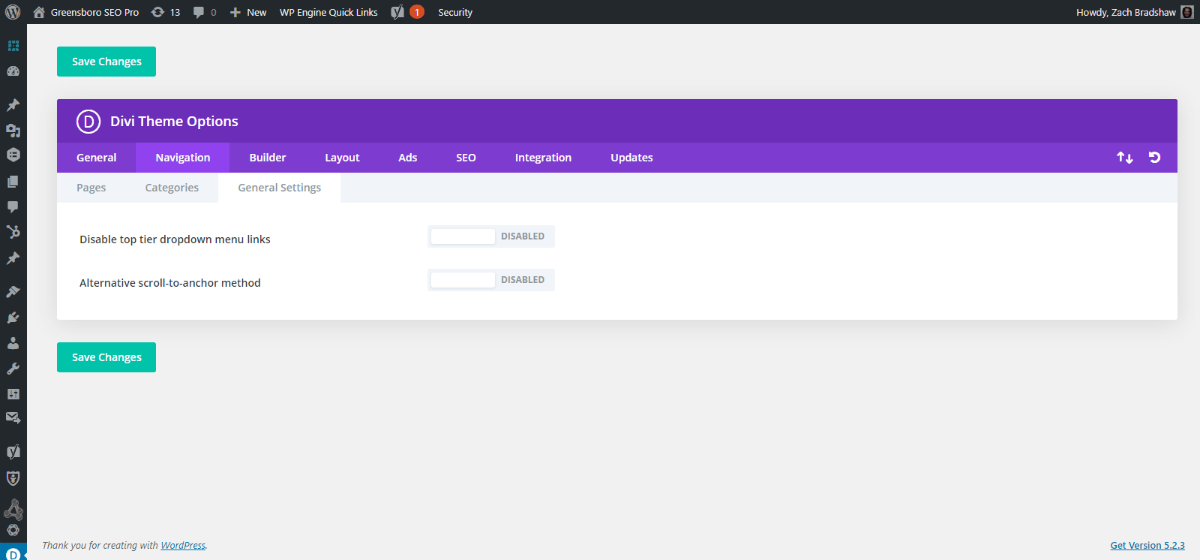
Divi General Navigation Theme Options Overview
- Set Disable top tier dropdown... - Disable this unless you prefer to use parent category links.
- Set Alternative scroll-to-anchor... - Disable this unless your anchor links are inaccurate.
Builder
Divi Builder Settings is another important but short list. The builder settings let you customize your overall Divi experience. Choose whether to use the new WordPress block editor or not. Enable the Divi builder on a per-post-type basis. And refine your CSS outputs. Go to Builder >>> Post Type Integration. Copy these settings: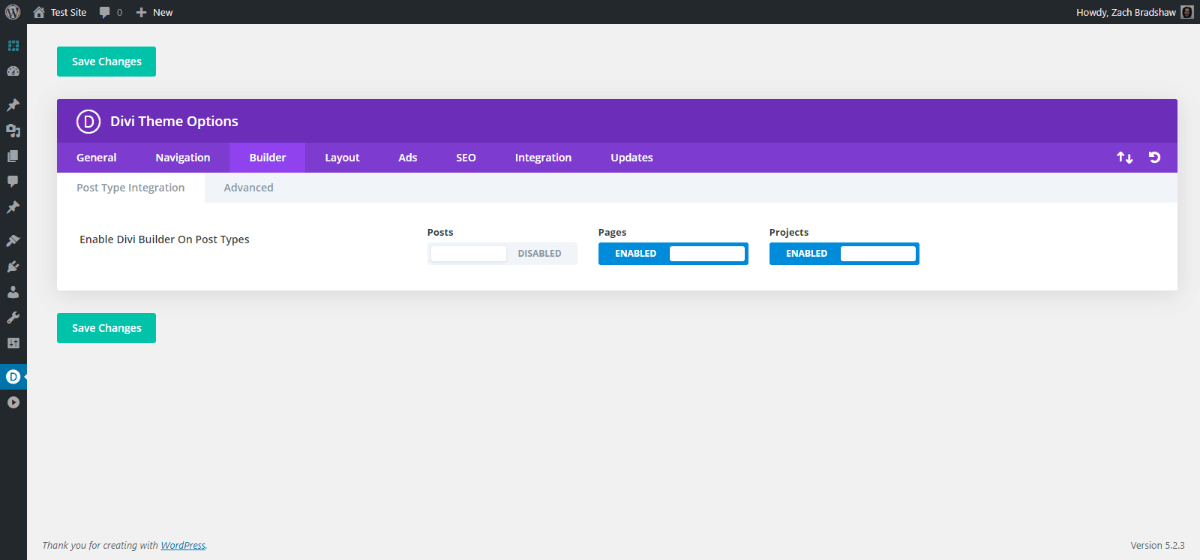
Divi Builder Post Type Theme Options Overview
- Set Enable Divi Builder on post ... - Disable the the Divi Builder on any post types you prefer.
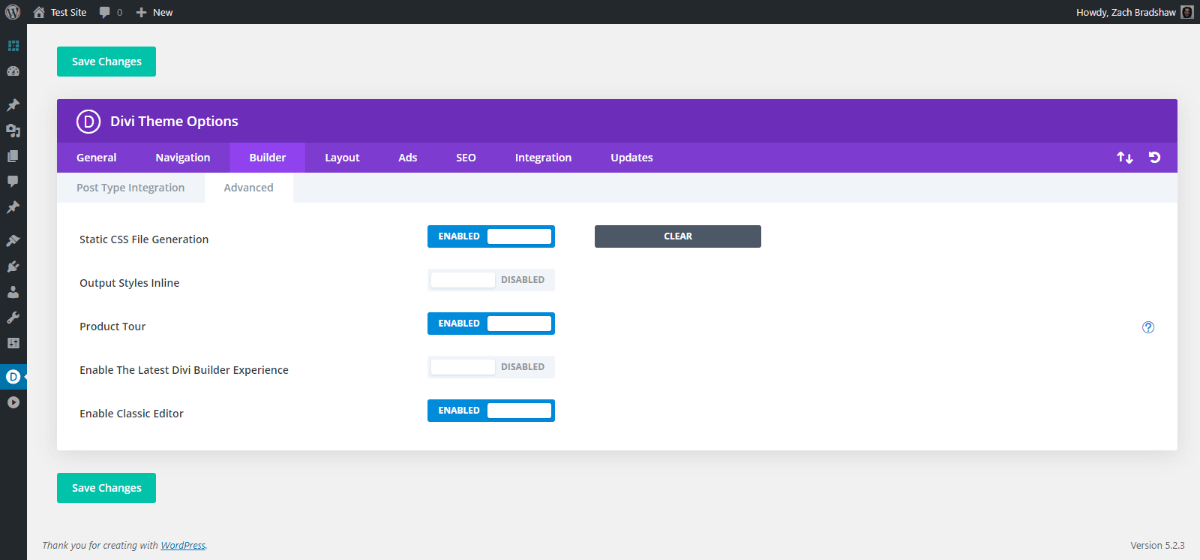
Divi Builder Advanced Theme Options Overview
- Set Static CSS File Generation - Enable this option to cache your CSS for better performance.
- Set Output Styles Inline - Disable this option unless you need/prefer Divi's old output styles.
- Set Product Tour - Enable to get a tour of Divi Builder the first time a user opens it. Very helpful.
- Set Enable The Latest Divi Builder... - Enable to maximize all the features Divi 4 has to offer.
- Set Enable Classic Editor - Enable the Classic Editor to use the WYSIWYG editor for posts.
Layout
Divi Layout Settings are another simple group. Here, you'll find a few basic settings for post metadata, thumbnails, and comments. If you don't have a blog, you can skip most of this. But if you do, these settings can affect the engagement rates of your content. Go to Layout >>> Single Post Layout. Copy these settings: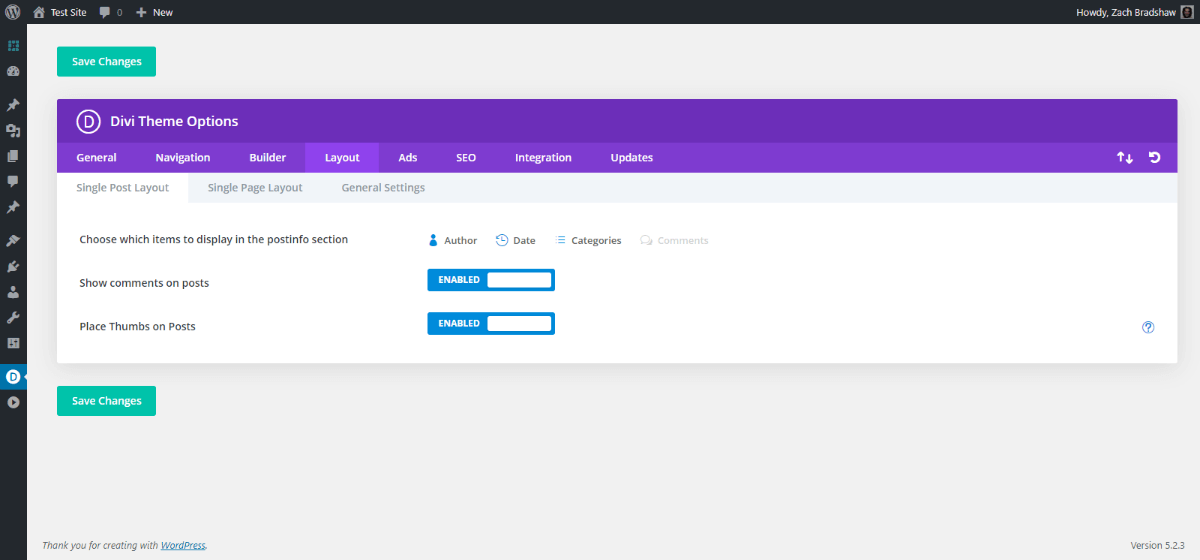
Divi Single Post Layout Theme Options Overview
- Set Choose which items to display... - Choose author, date, and categories or your preference.
- Set Show comments on posts - Enable comments to allow users to comment on your posts.
- Set Place Thumbs on Posts - Enable this option to use your featured images as post headers.
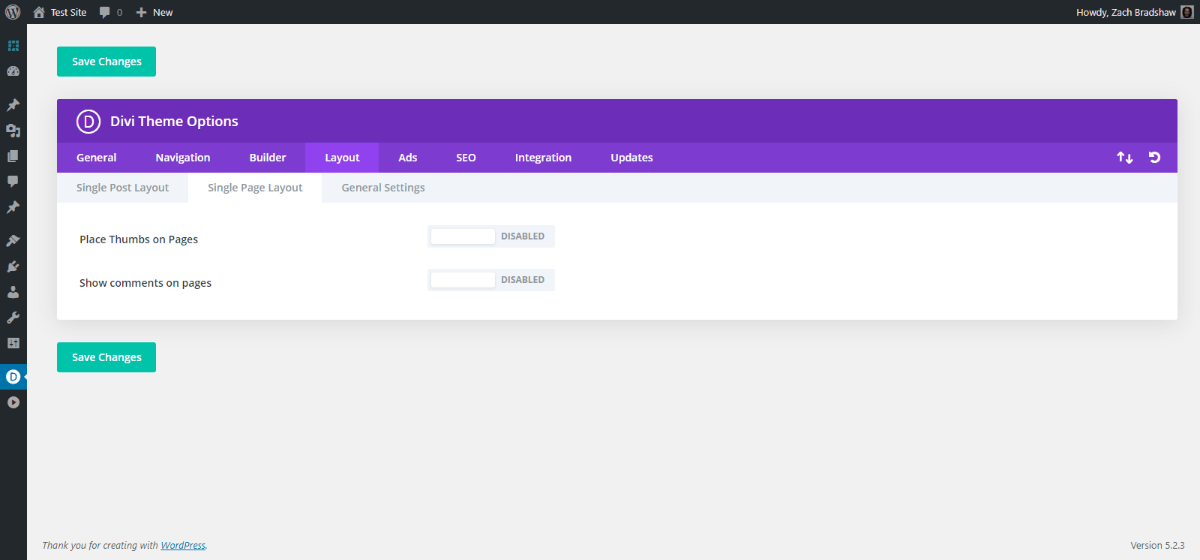
Divi Single Page Layout Theme Options Overview
- Set Place Thumbs on Pages - Disable to prevent featured images displaying as page headers.
- Set Show comments on pages - Disable to remove the comment section from your pages.
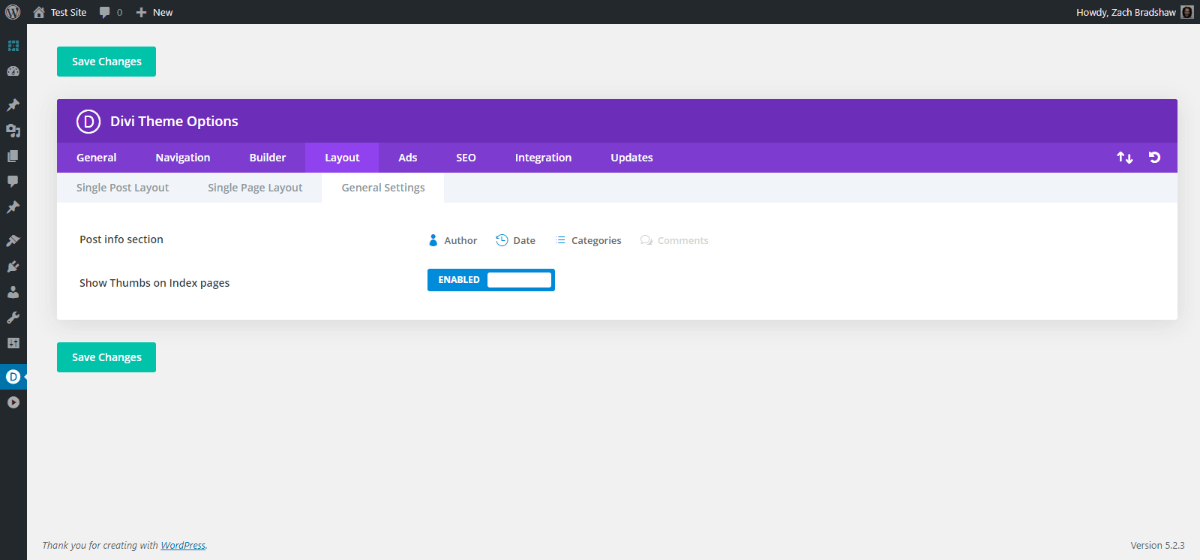
Divi General Layout Theme Options Overview
- Set Post info section - Choose author, date, and categories or your preference.
- Set Show Thumbs on Index Pages - Enable featured images on post archives.
Ads
Divi Ads Settings aren't that robust. They allow you to add an adsense banner at the bottom of your blog posts. It's not much, but at least it is easy to use. Go to Ads >>> Manage Un-widgetized Advertisements. Copy these settings: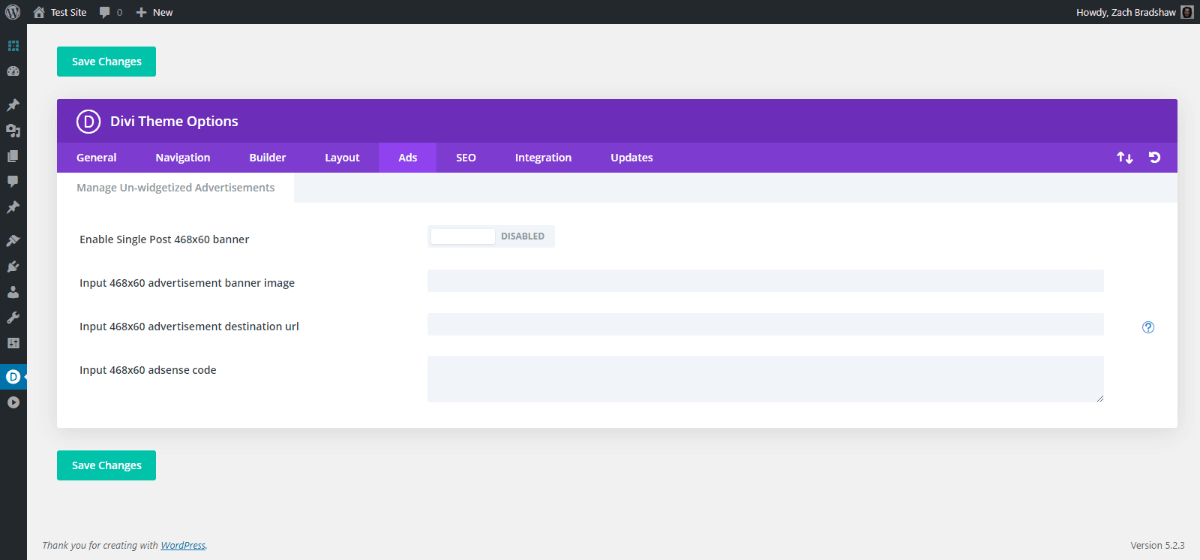
Divi Ads Theme Options Overview
- Set Disable Single Post 468x60 banner - Disable unless you want a basic advertising banner.
- Set Input 468x60 advertisement banner... - Leave blank or add your AdSense banner URL.
- Set Input 468x60 advertisement destination... - Leave blank or add your destination URL.
- Set Input 468x60 adsense code - Leave blank or add your AdSense destination code.
SEO
Divi SEO Settings are pretty good as far as WP themes go. We prefer to use dedicated SEO plugins. But you can definitely pull off some decent SEO with Divi's SEO settings alone. Titles, meta descriptions, canonical URLs—not bad at all. Go to Divi >>> Theme Options. Copy these settings: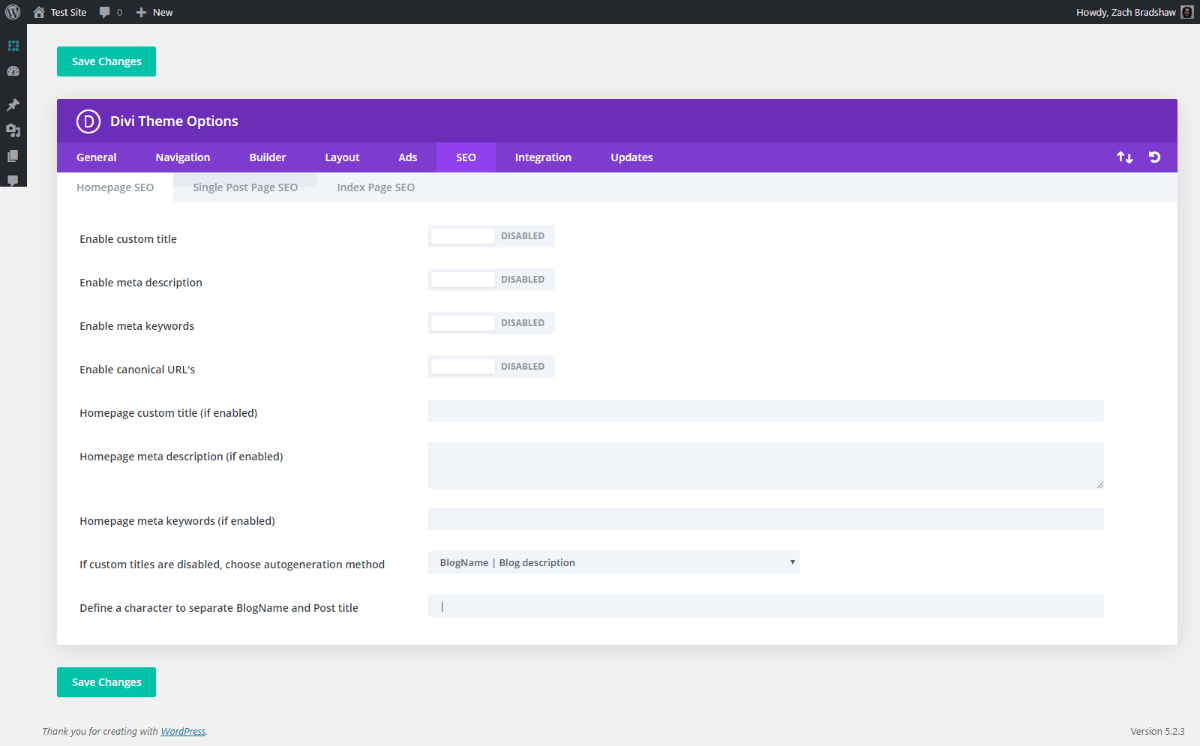
Divi Homepage SEO Theme Options Overview
- Set Enable Custom Title - Disable unless you prefer to set your titles in Divi directly.
- Set Enable Meta Description - Disable unless you prefer to set your descriptions in Divi directly.
- Set Enable Meta Keywords... - Disable and forget these exist, as they are no longer relevant.
- Set Enable Canonical URL's - Disable unless you need to set canonical URLs with Divi.
- Set Homepage Custom Title... - Leave blank unless you have enabled custom titles.
- Set Homepage Meta Description... - Leave blank unless you have enabled meta descriptions.
- Set Homepage Meta Keywords... - Leave blank and forget these exist, as they are not relevant.
- Set If Custom Titles are Disabled... - Choose "BlogName | BlogDecription as default title.
- Set Define a Character to Separate... - Enter " | " as the character to separate the title.
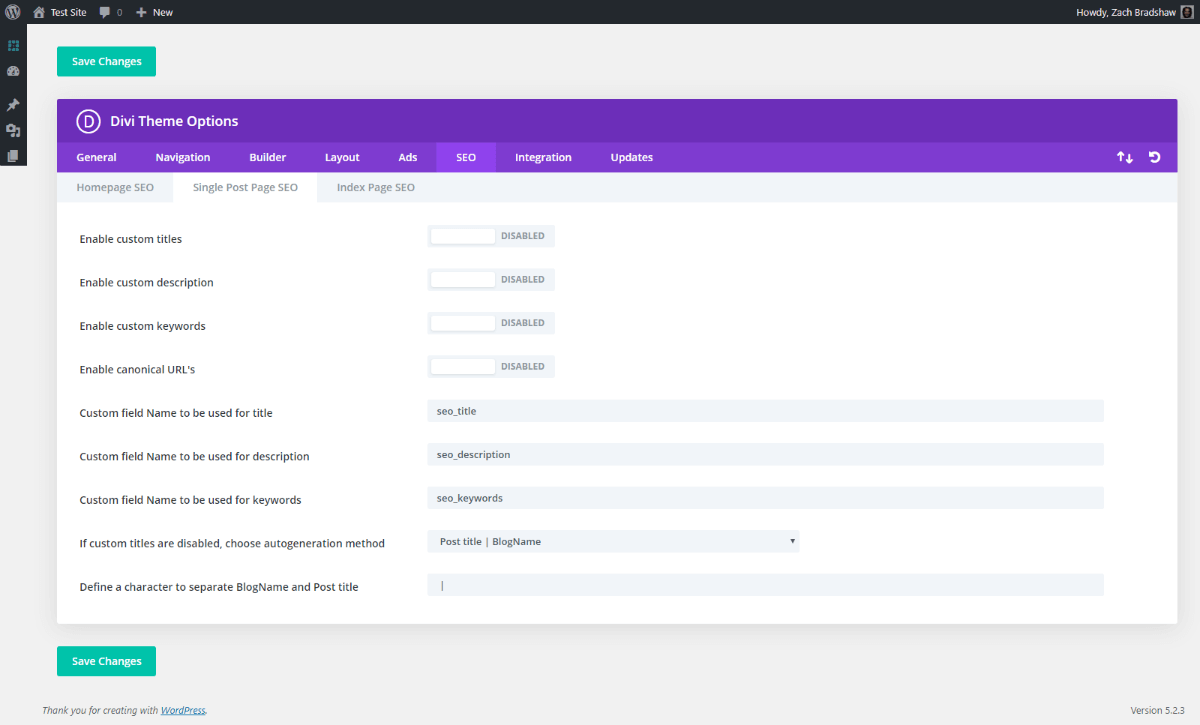
Divi Single Post Page SEO Theme Options Overview
- Set Enable Custom Titles - Disable unless you prefer to set your titles in Divi directly.
- Set Enable Custom Description - Disable unless you prefer to set meta descriptions in Divi.
- Set Enable Custom Keywords - Disable and forget these exist, as they are no longer relevant.
- Set Enable Canonical URL's - Disable unless you need to set canonical URLs with Divi.
- Set Custom Field Name.. Title - Leave default unless you have enabled custom titles.
- Set Custom Field Name... Description - Leave default unless you are using custom descriptions.
- Set Custom Field Name... Keywords - Leave blank and forget these exist, as they are not relevant.
- Set If Custom Titles are Disabled... - Choose "Post title | BlogName as default title.
- Set Define a Character to Separate... - Enter " | " as the character to separate the title.
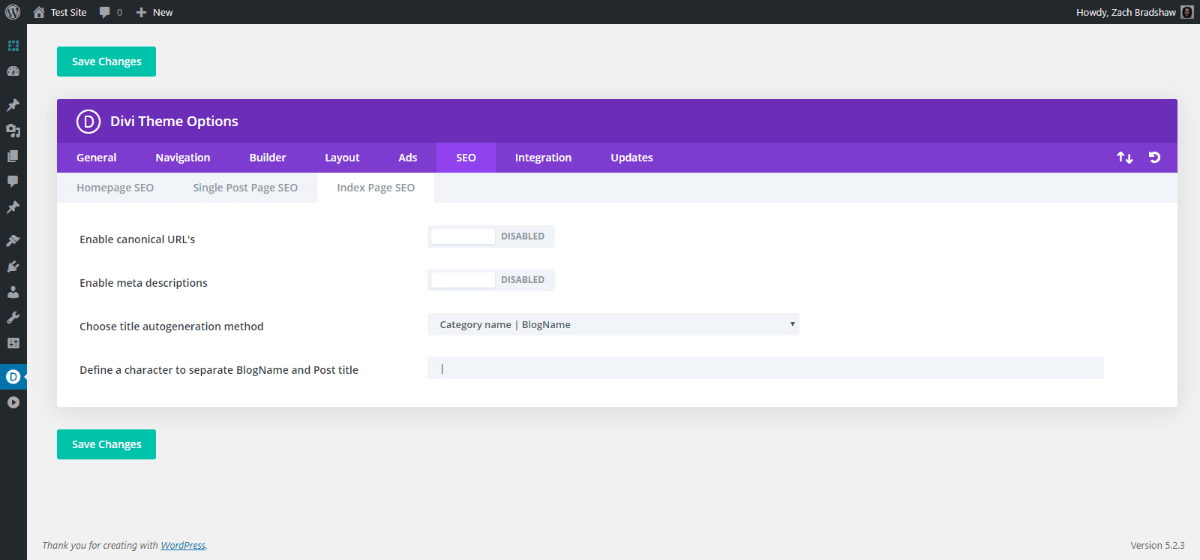
Divi Index Page SEO Theme Options Overview
- Set Enable Canonical URL's - Disable unless you need to set canonical URLs with Divi.
- Set Enable Meta Descriptions - Disable unless you prefer to set meta descriptions in Divi.
- Set Choose Title Autogeneration... - Choose "Category name | BlogName as default title.
- Set Define a Character to Separate... - Enter " | " as the character to separate the title.
Integration
Divi Integration Settings are crucial for advanced marketing. If you want a website that makes you money, you'll definitely have some code to add here. This area prevents the need for extra plugins for your marketing scripts and other advanced customizations. Go to Integration >>> Code Integration. Copy these settings: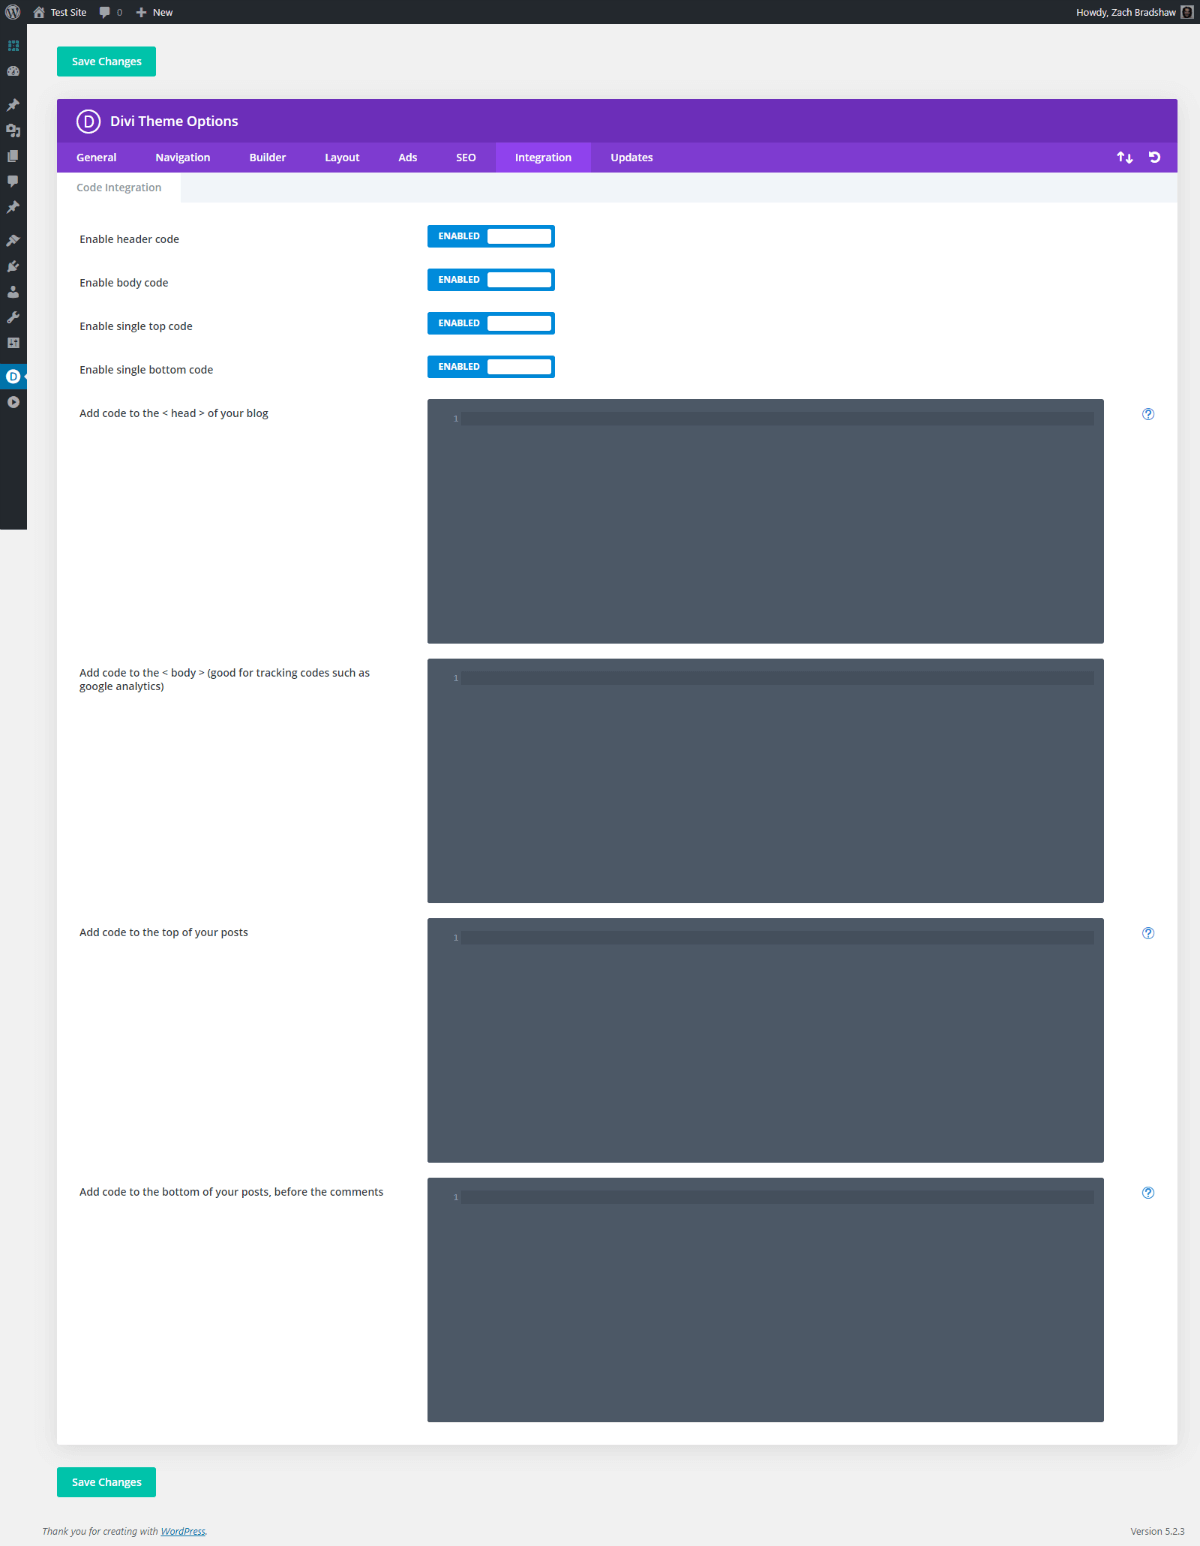
Divi Code Integration Theme Options Overview
- Set Enable Header Code - Enable to add code to the < head > of all website pages.
- Set Enable Body Code - Enable to add code to the top of the < body > of all website pages.
- Set Enable Single Top Code - Enable to add code specifically to the top of all blog posts.
- Set Enable Single Bottom Code - Enable to add code specifically to the bottom of all blog posts.
- Set Add Code to the < Head >... - Enter your preferred < head > code here.
- Set Add Code to the < Body >... - Enter your preferred < body > code here.
- Set Add Code to the Top... - Enter your preferred top of post code here.
- Set Add Code to the Bottom... - Enter your preferred bottom of post code here.
Updates
Divi Updates Settings are needed to keep your Divi install current. Username and password is all you need to enter here. This should have been completed when you installed Divi. Go to Updates >>> General. Copy these settings: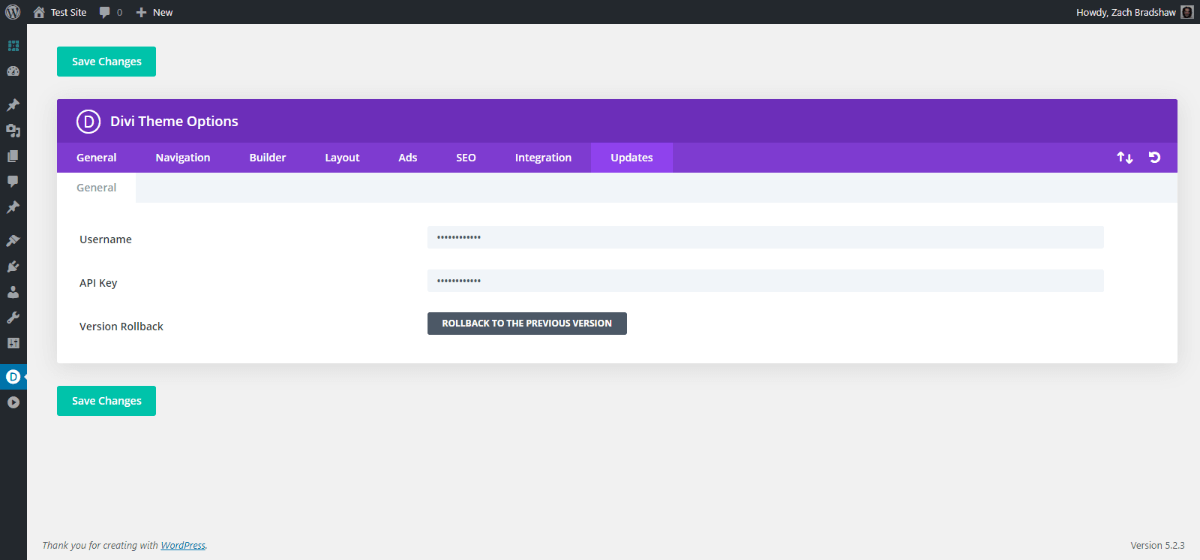
Divi Updates Theme Options Overview
- Set Username - Enter your Elegant Themes Username here to receive product updates
- Set API Key - Enter your Elegant Themes API Key here to receive product updates.
- Set Version Rollback - If you need to rollback a recent update, you can do so here.
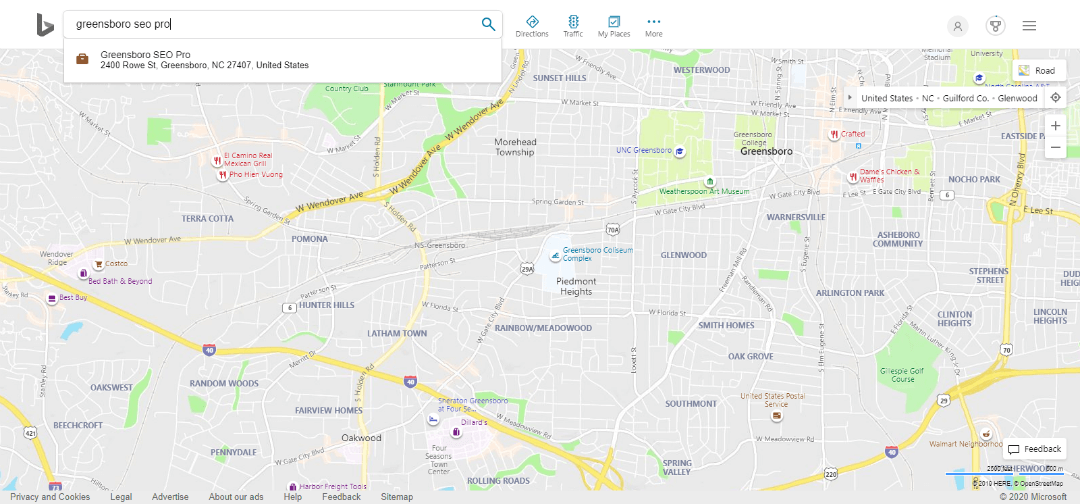
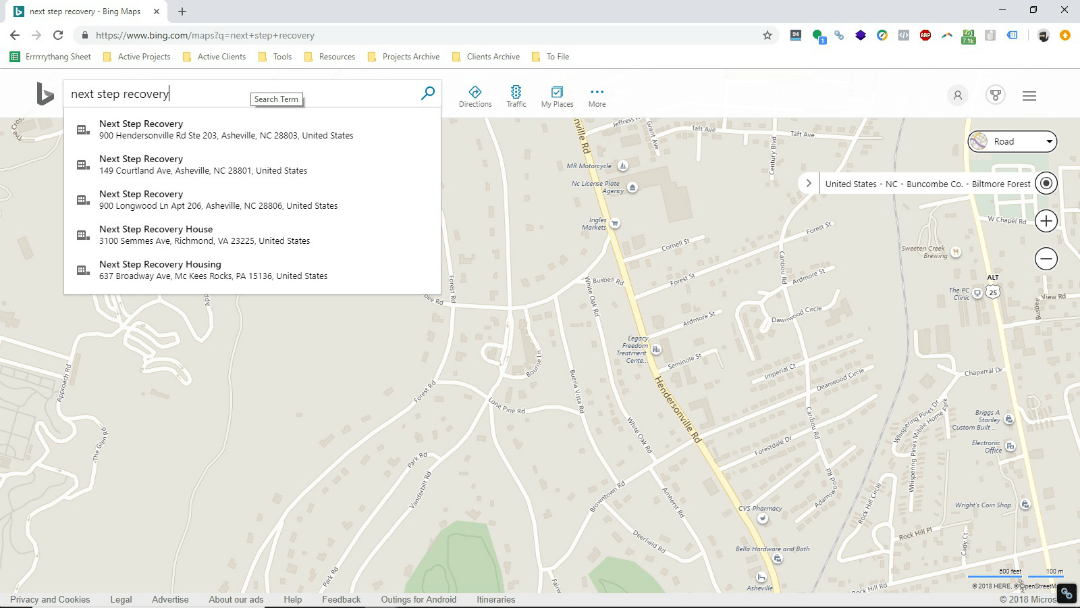
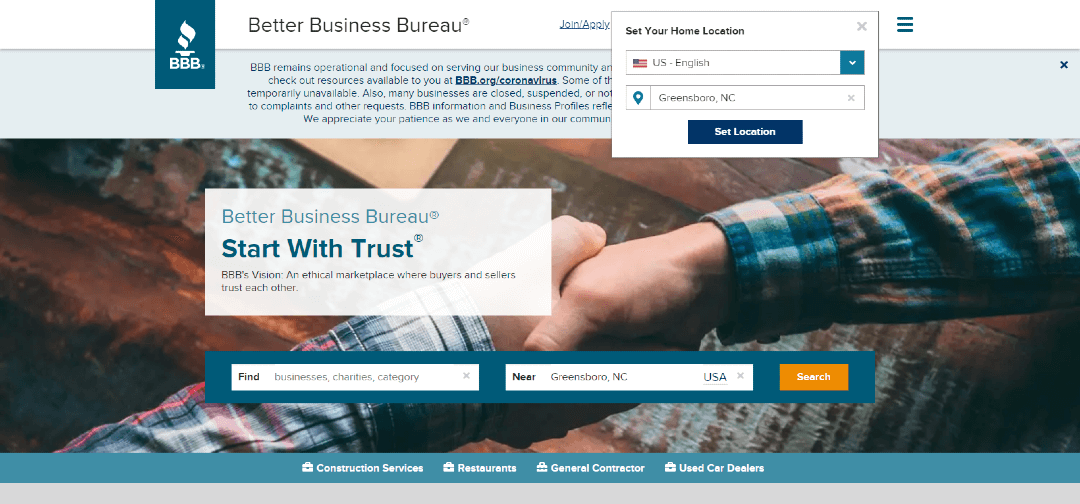 Once set, proceed to search. If it recognizes your business, it will try to autofill your brand info.
 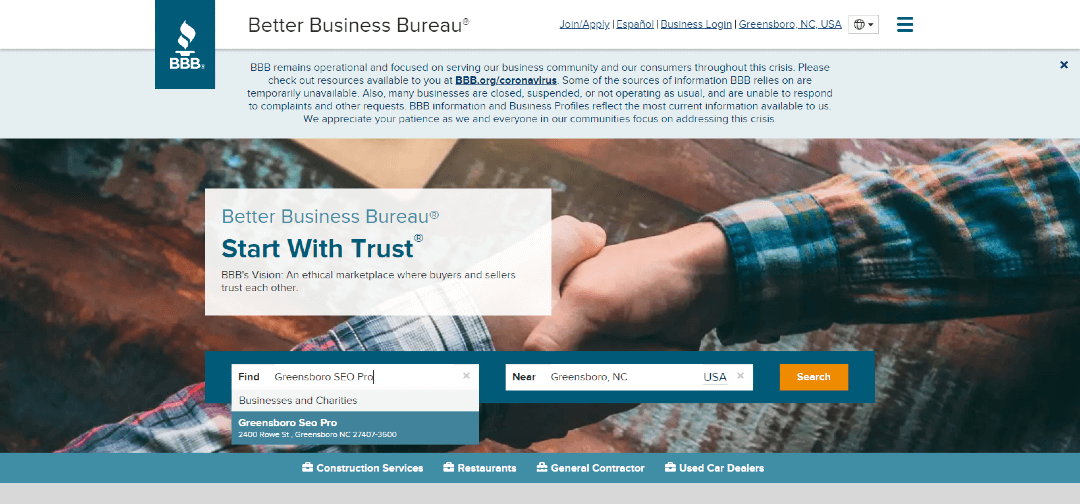 You can select it to go straight to your listing. But we recommend completing the search to make sure you don't have any duplicates. You may find you business in a list.
 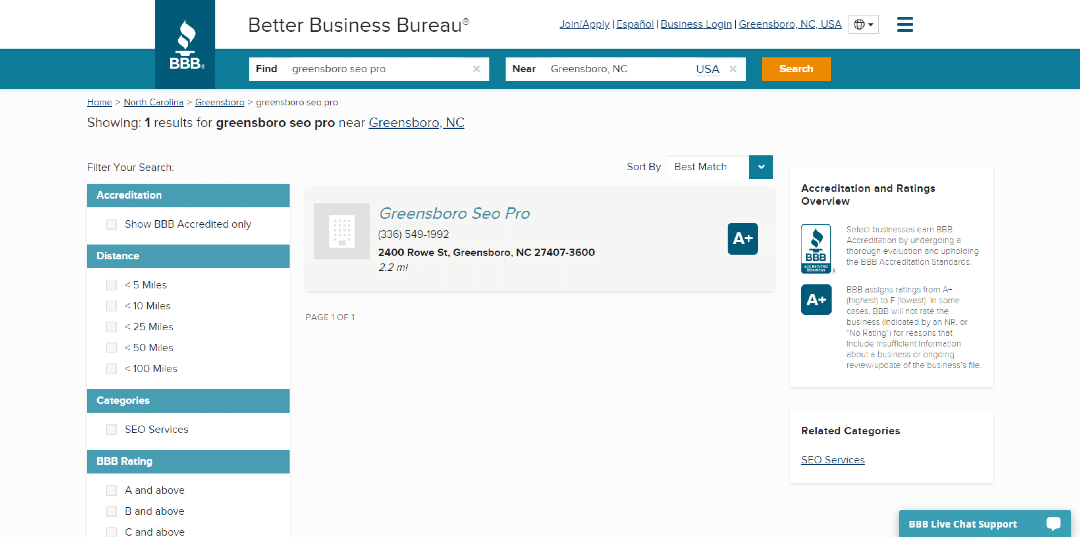 Or you may not find any results that match your info.
  Record any and all listings you find for your business. Their format includes city and category:
 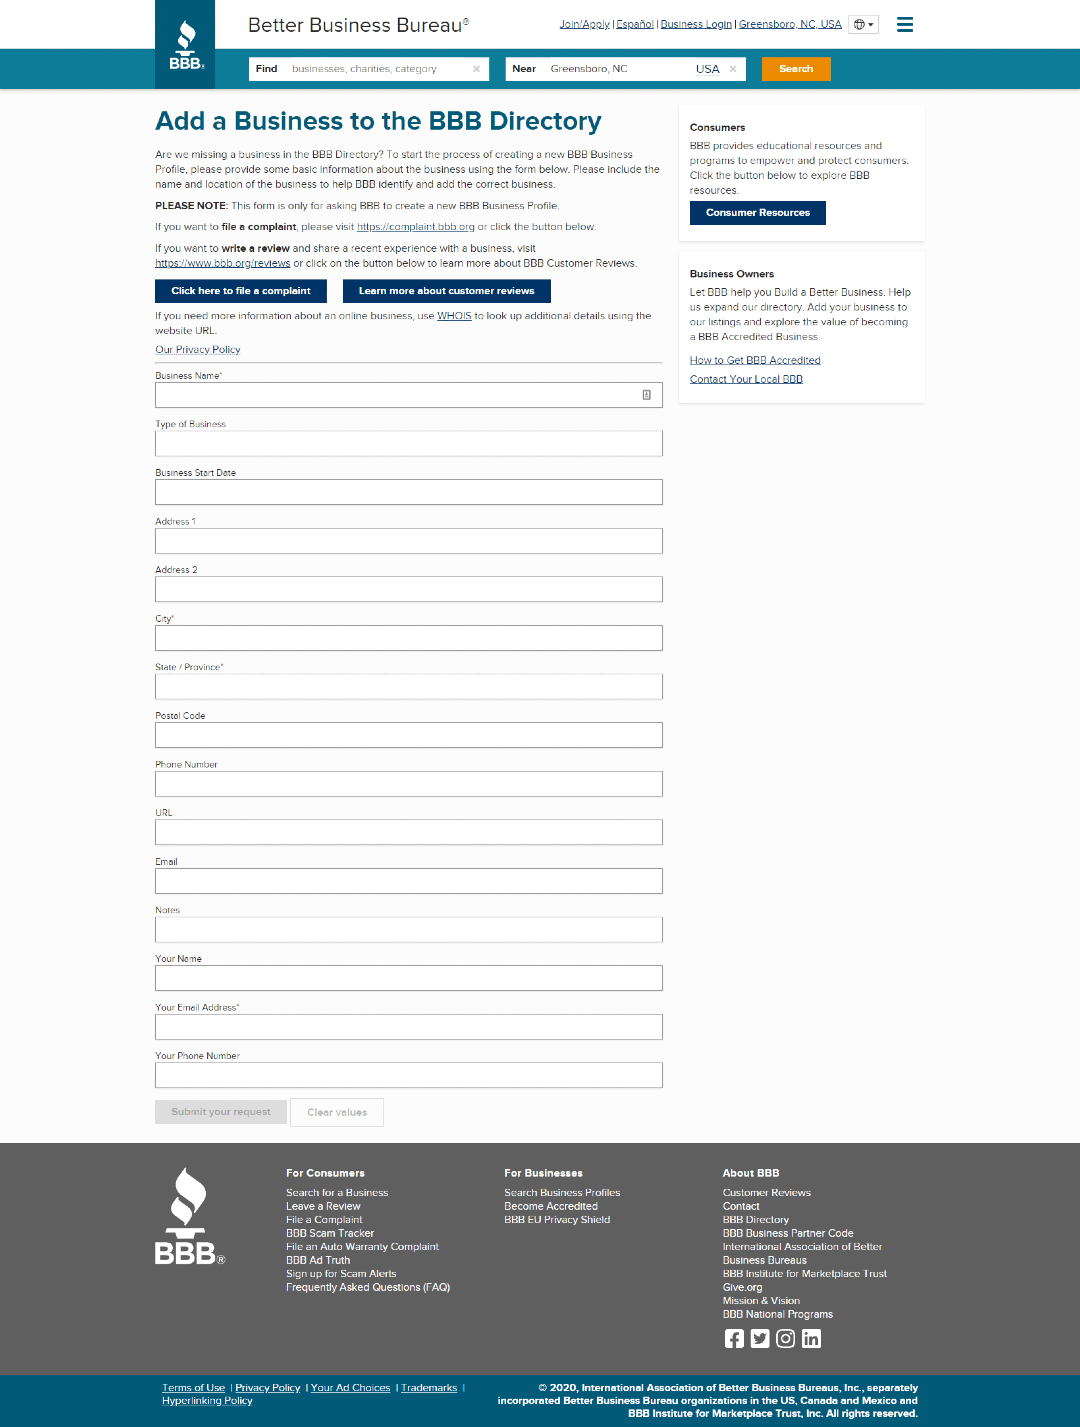 It's really that easy. However, they have a backend approval process. So you aren't guaranteed to get your listing published. We've had profiles get rejected the first time. It's rare. But it does happen. Resubmitting has worked for us so far. If we ever needed to take additional steps, it would probably look like the claim process.
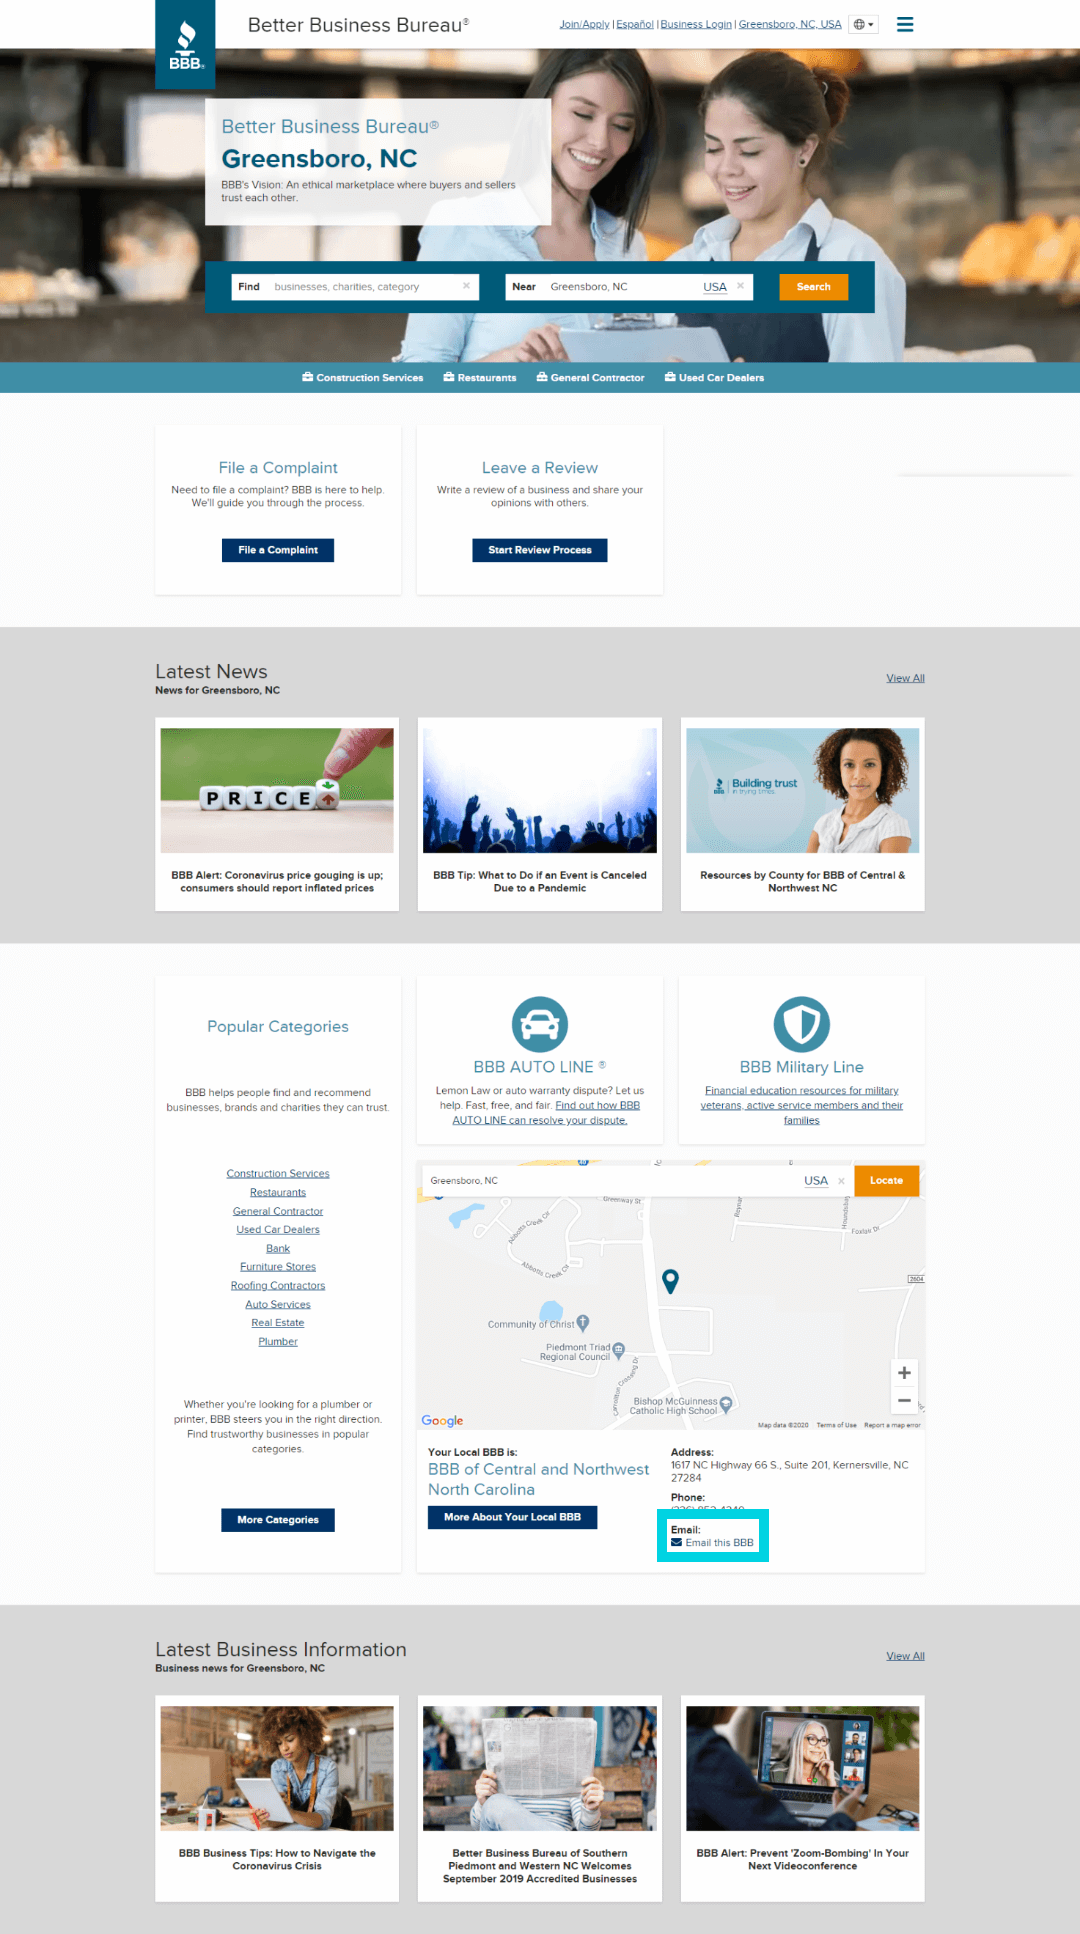 Click it. A short form will pop up.
  Fill in your name and email. (We recommend a branded email address.) Then write a message telling them about your business. We like to include a link to one of our main profiles like Facebook or Google Maps as well. Submit and you can usually expect a reply via email in less 48 hours or less. This is more of an "edit request" than a profile claim. But it gets the job done.
 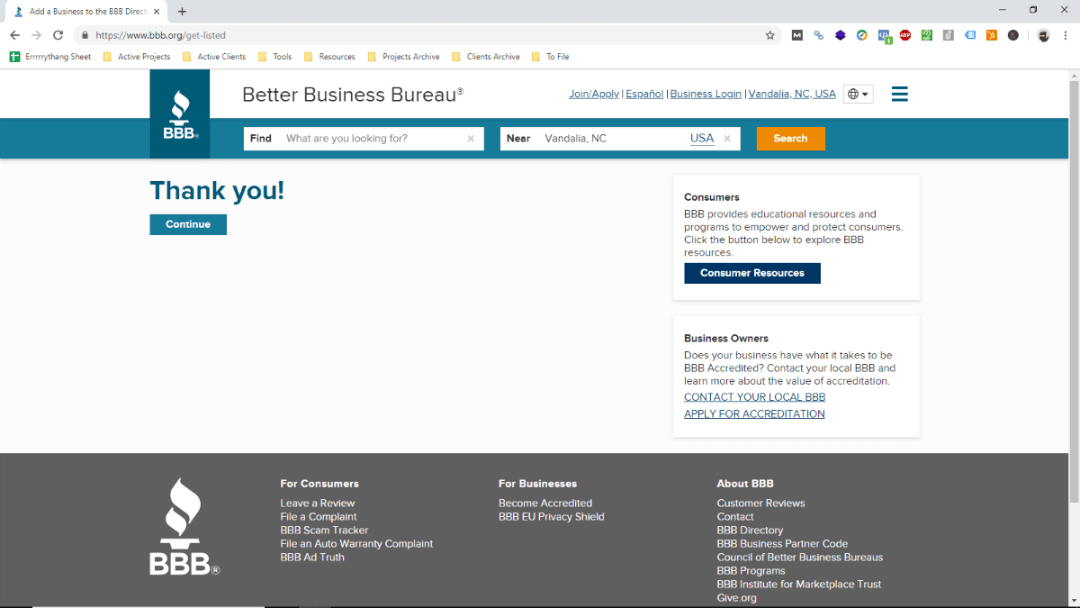 If you're correcting info, they often remove the original URL and create a new one. This means the duplicate process is much the same.
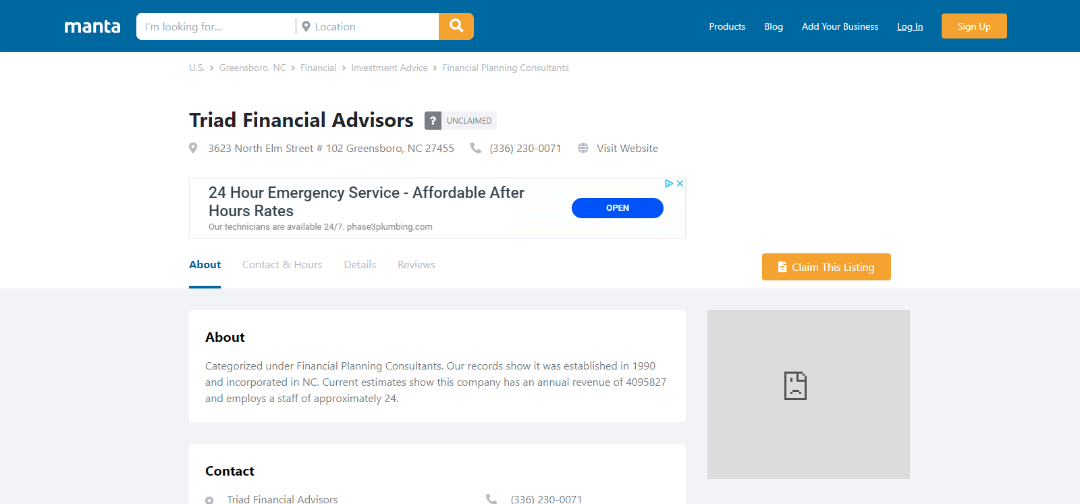
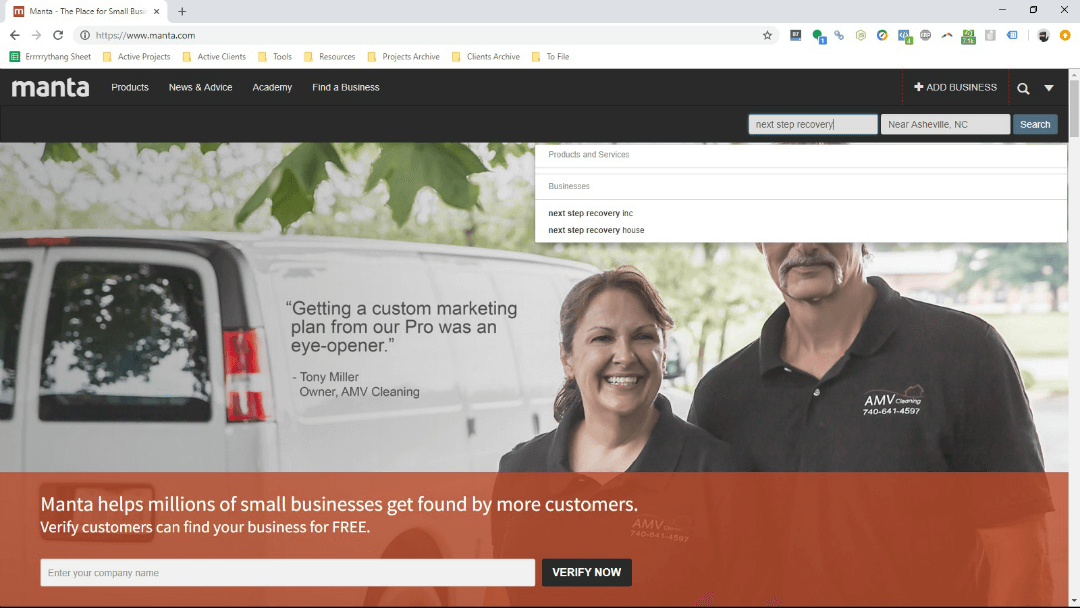 Search your business name. It will try to autocomplete your search with a brand name. The recommendations aren't always helpful. And you aren't required to set a location. Manta is fairly prone to duplicates and errors. It's also hard to be 100% confident that their search tools find all NAP variations. But it is usually pretty easy to find the duplicates you expect.
 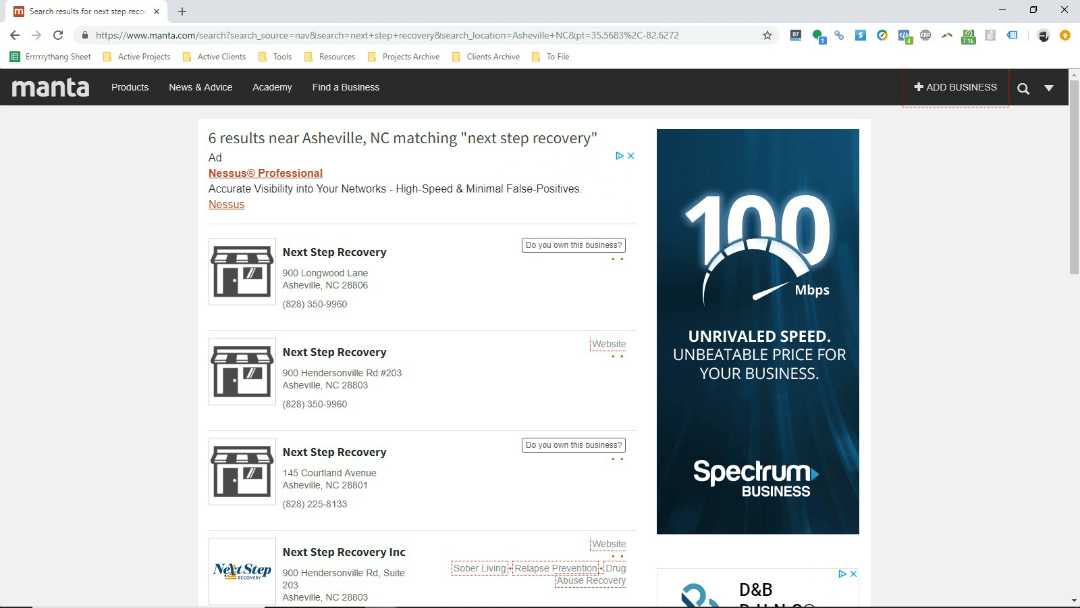 When there are a ton of NAP variations though, we find that you get better results when you don't set a location. You may also have to scroll through several pages of results to find everything. Not fun. But that's just how it is. 🤷♂️ At least their profile URLs are simple:
 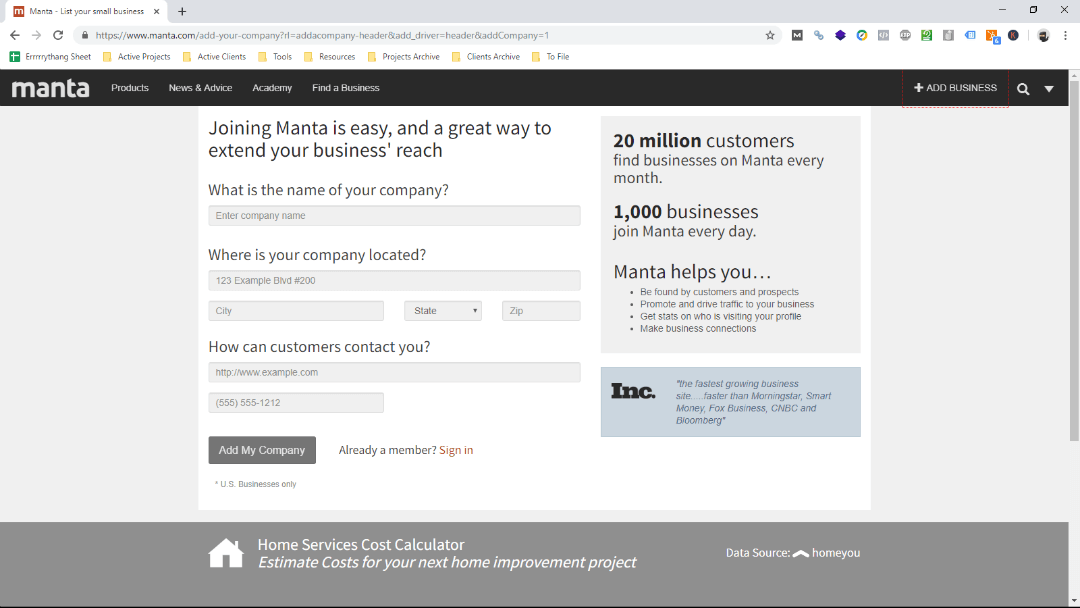 It's very easy to add and optimize new profiles on Manta. They have a fairly simple wizard that gets you started. Then they try to upsell you on Yext:
 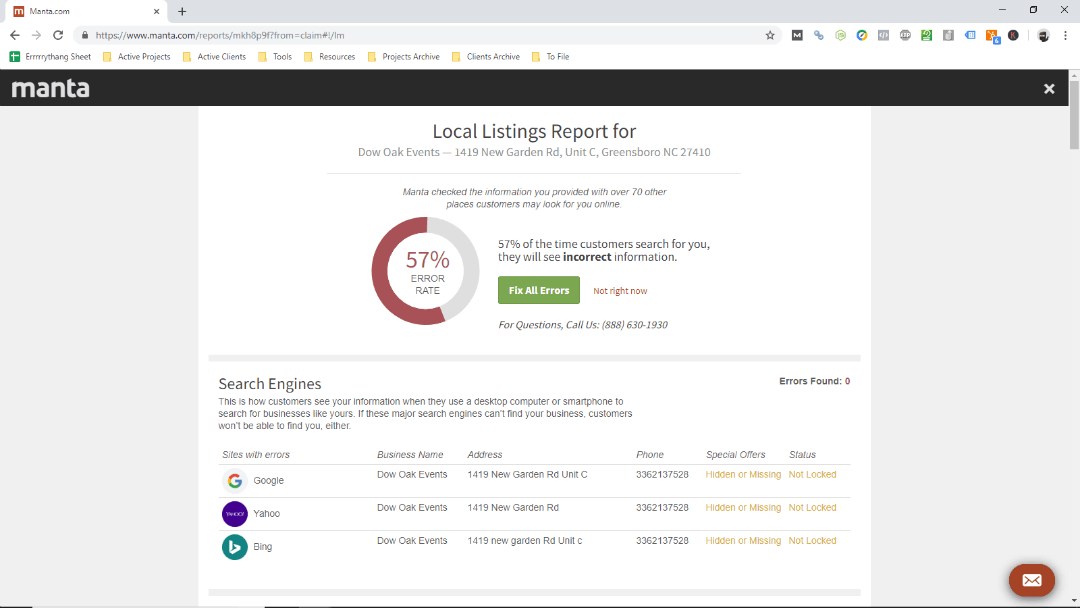 Just click that "Not right now" link and you'll come to the dashboard. From there, you have a variety of additional info you can add. The full claim process is much the same.
 Hover over the little "UNCLAIMED" tag and a message will pop up.
 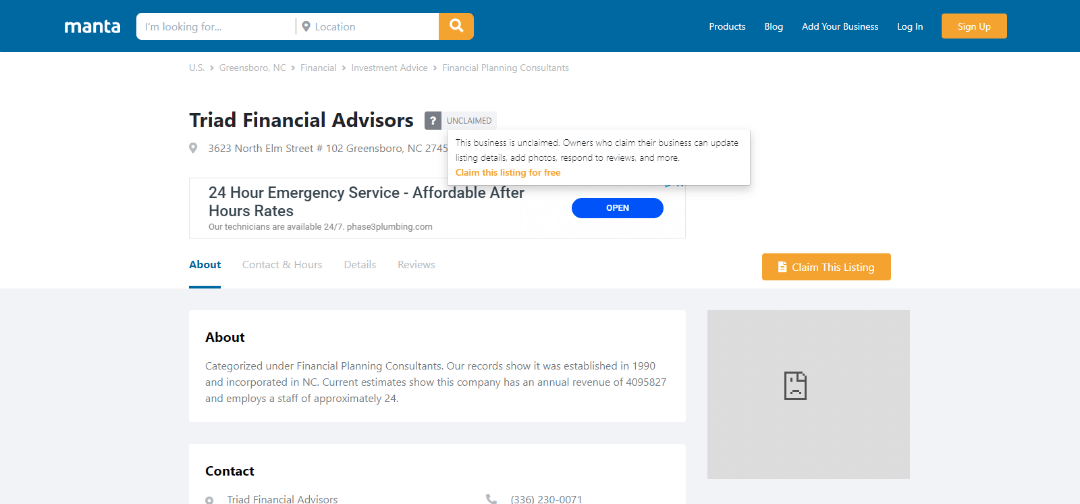 Click the "Claim this listing for free" link. You'll be brought to through the same wizard you would be for a new profile. Surprisingly, Manta does not require any sort of phone or domain verification. This makes it one of the easiest top-tier platforms to get control of. On the other side, this makes it easier for duplicate profiles more likely. If you have duplicates, you'll need to claim one and get rid of the others.
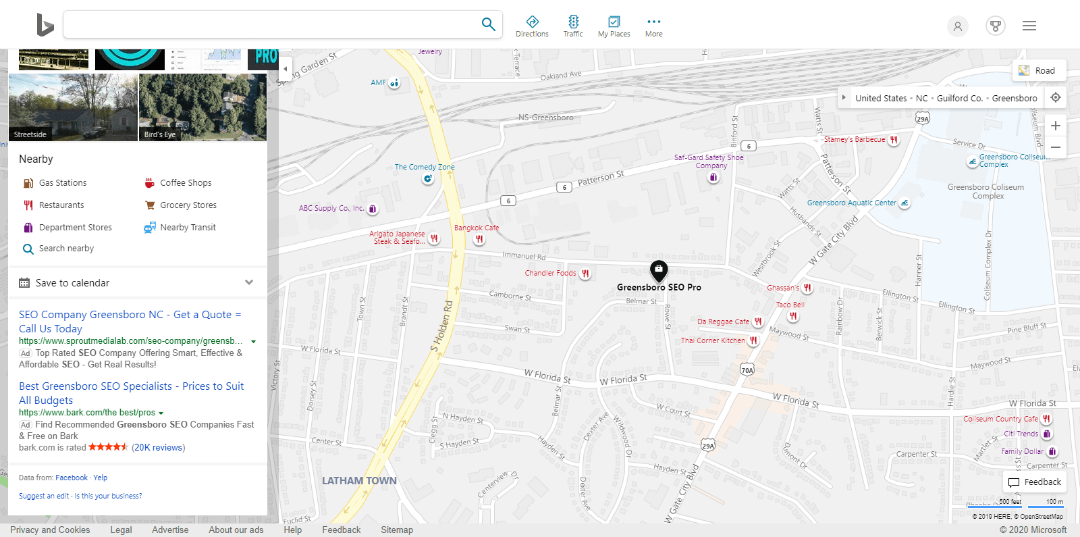
 If you have duplicates or other brands with similar names, you'll see multiple options. A knowledge panel will come up once you complete the search or choose one of the autocomplete options.
 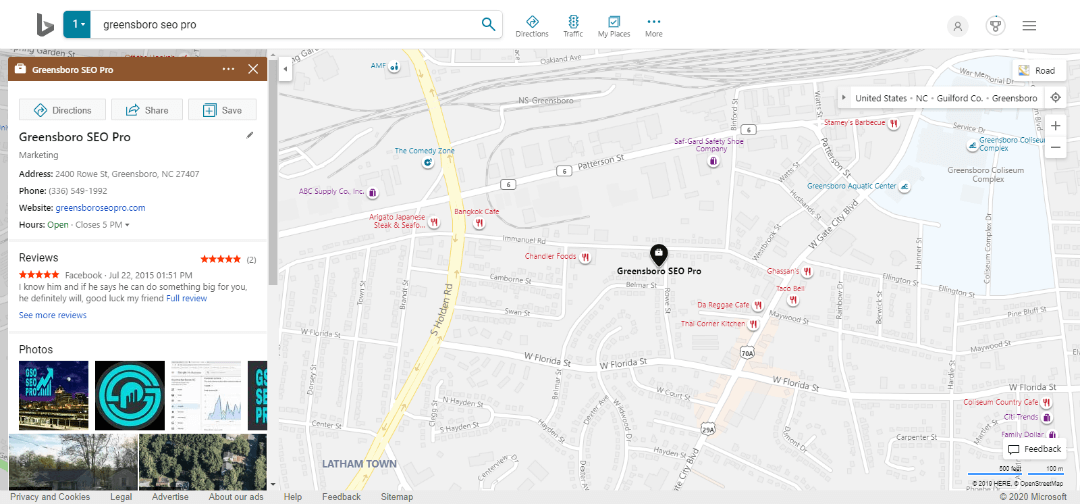 Click the "Share" button to get a URL you can save for your records.
 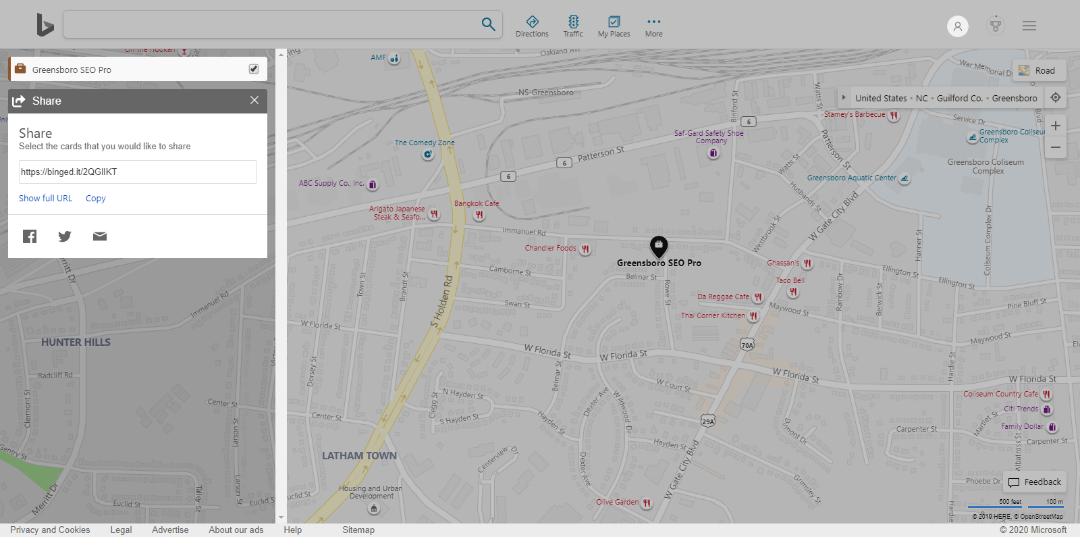 Their shortened links come out like:
 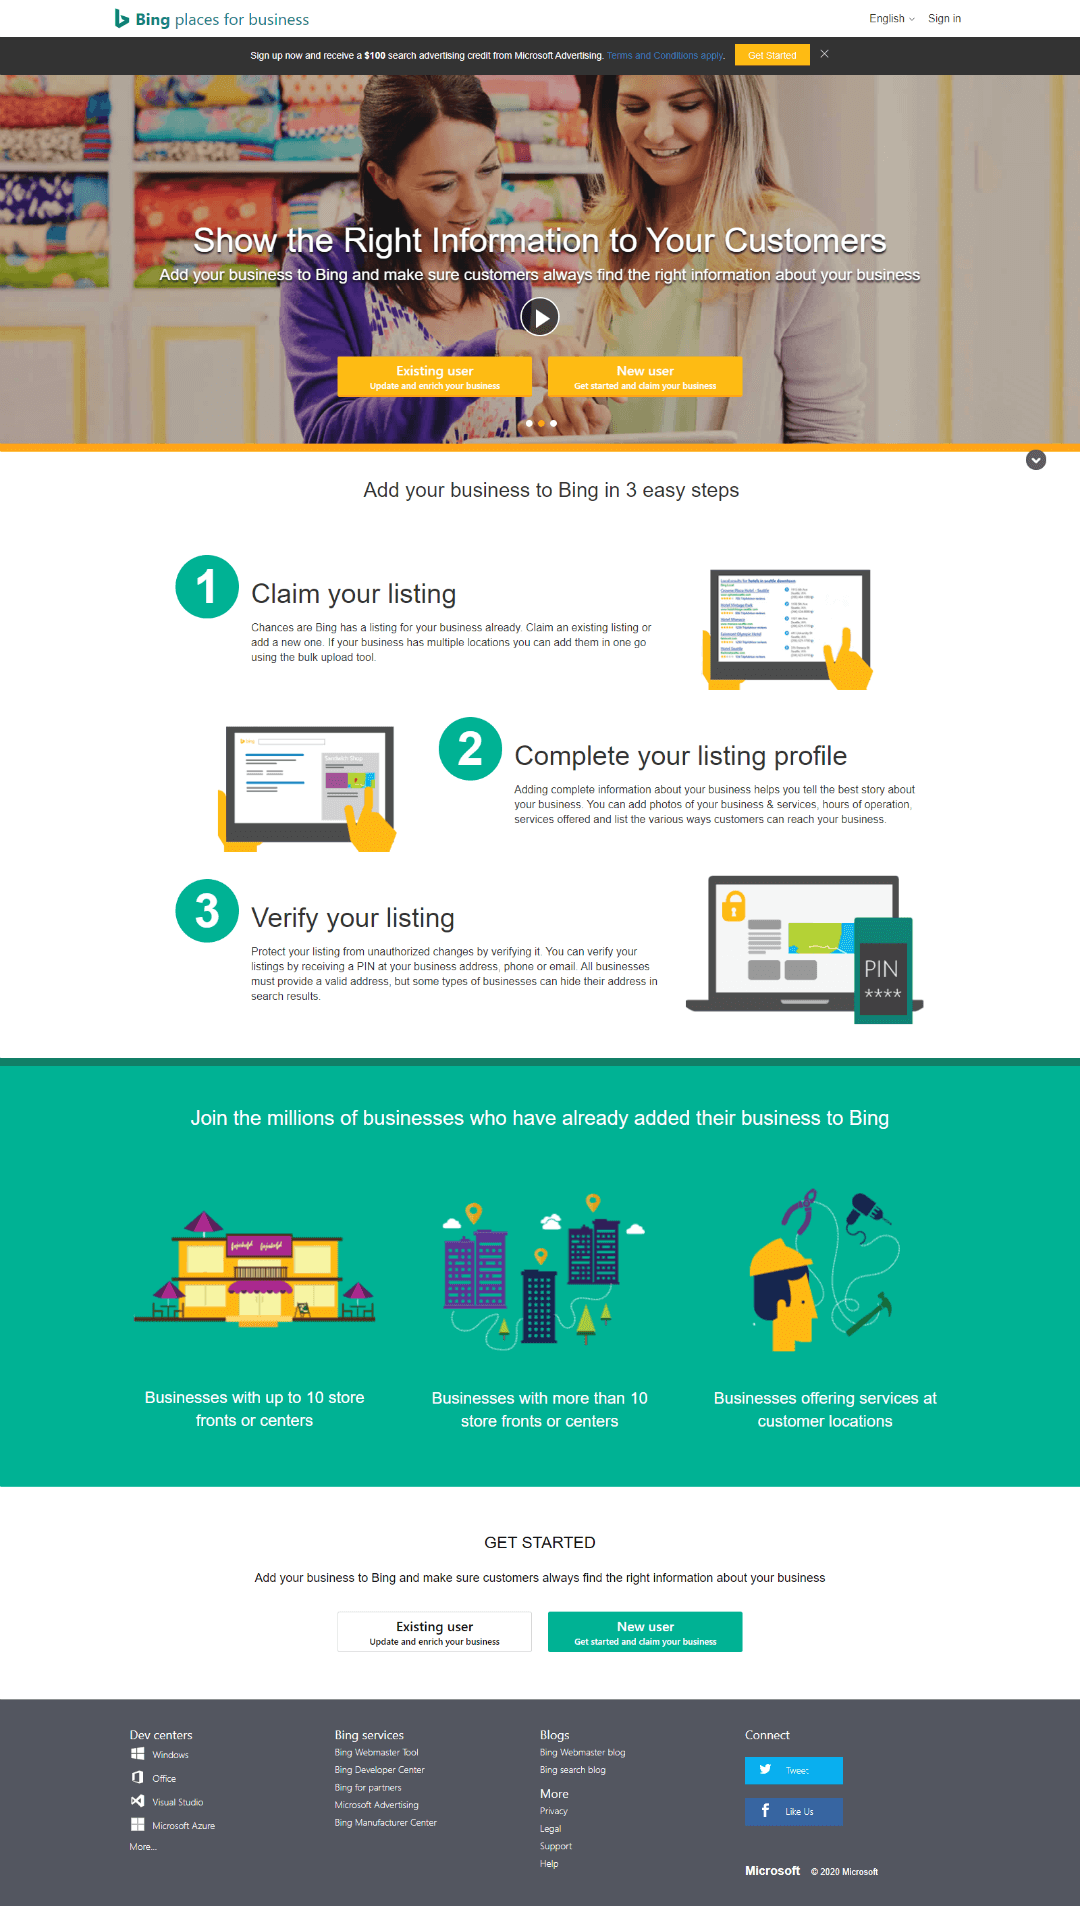 Click the "New User" button. This will begin a profile creation wizard. You can either sync your profile with your Google My Business listing or create it from scratch.
 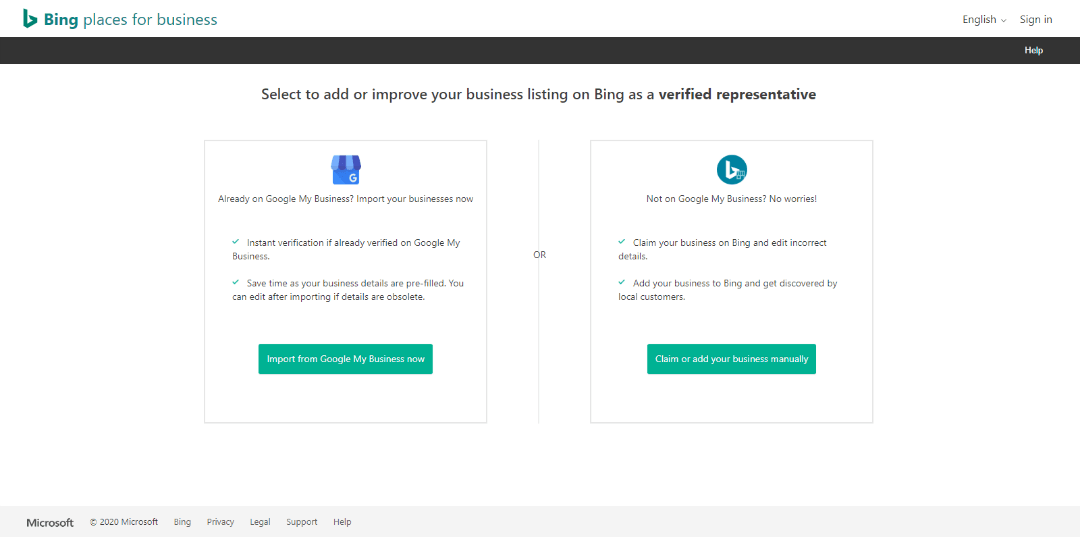 If your business's Google My Business profile is already optimized, you can import your info. It will be pre-fill your business info and verify it automatically. There is probably nothing wrong with this option. Still, we choose the manual path. In our estimation, verifying directly with Bing sounds more future proof. Moreover, we opt for postcard verification over phone verification.
 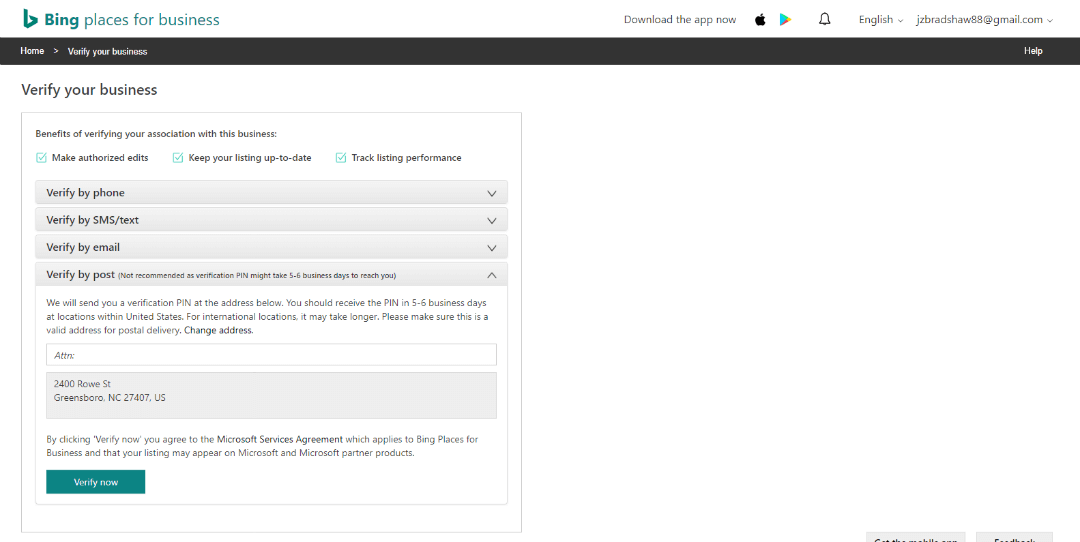 Once verified, proceed to the Edit business menu screen.
 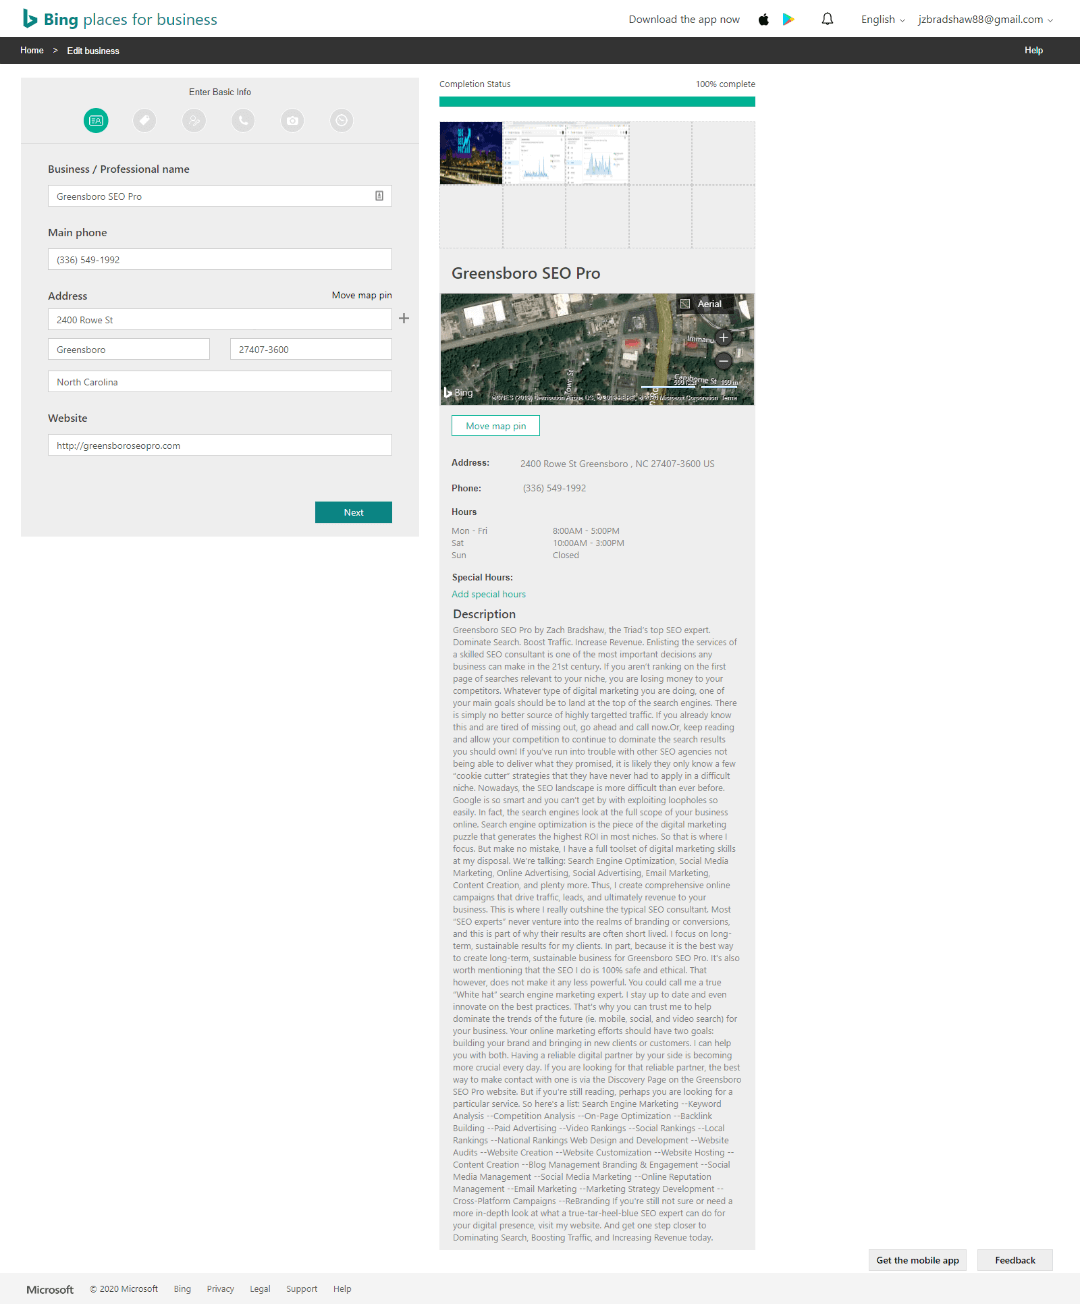 Optimize everything.
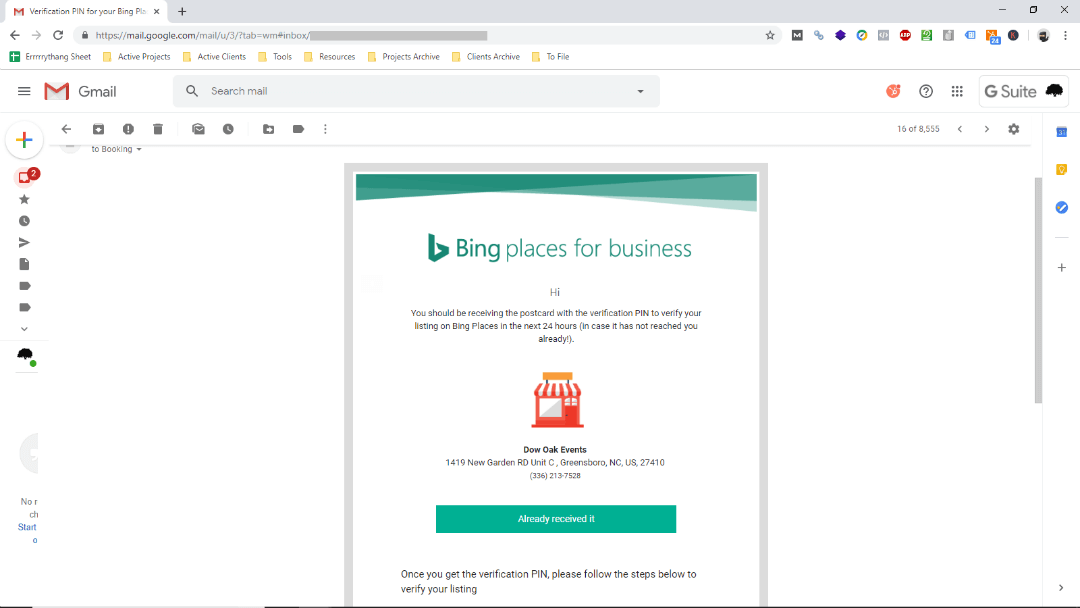 As you see, their postcard comes fast. Once it arrives, you can return to your email to log back in and enter your PIN. Don't forget to come back and verify your profile. Sure. It's a bit of a pain. But it helps Bing keep their directory clean. And it helps you get more customers. If you want to perform well in local search results, add your business to Bing. Or, if you've already found your business, simply take control.
 It will bring you to a profile claims wizard.
 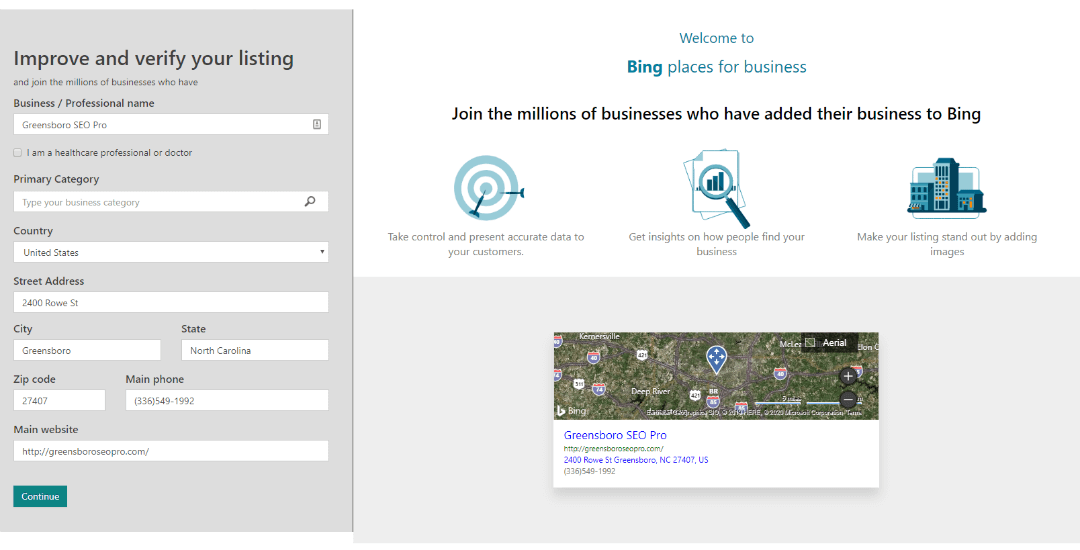 Make sure your info is correct then click the "Continue" button. It will bring you to a login screen.
 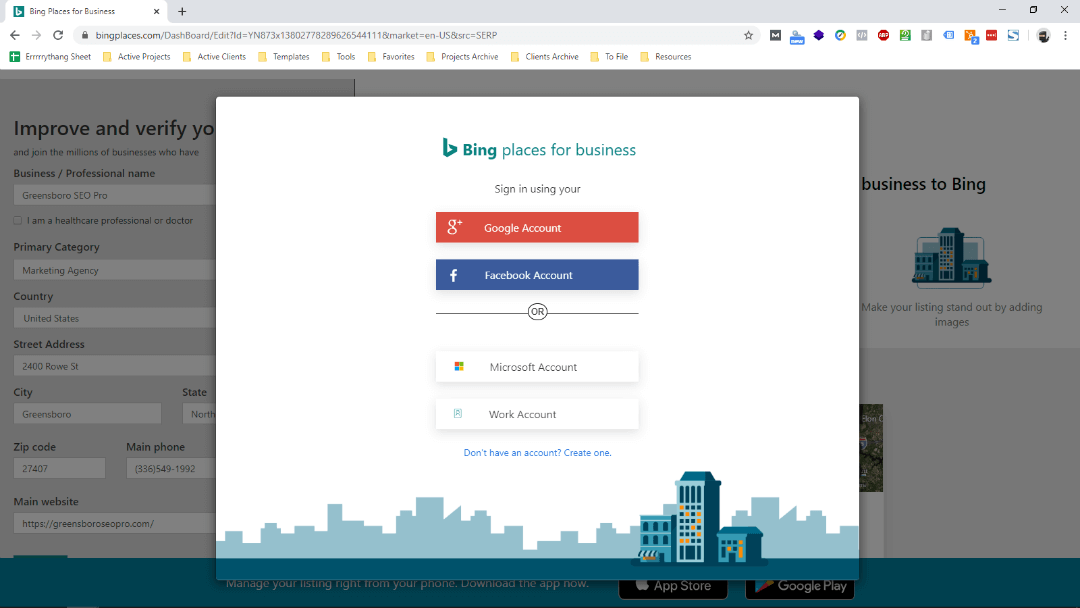 We choose to create a new Microsoft account if the business does not have one already. From there, you'll have to verify. For listings that already exist, we verify by phone unless we are correcting the address.
 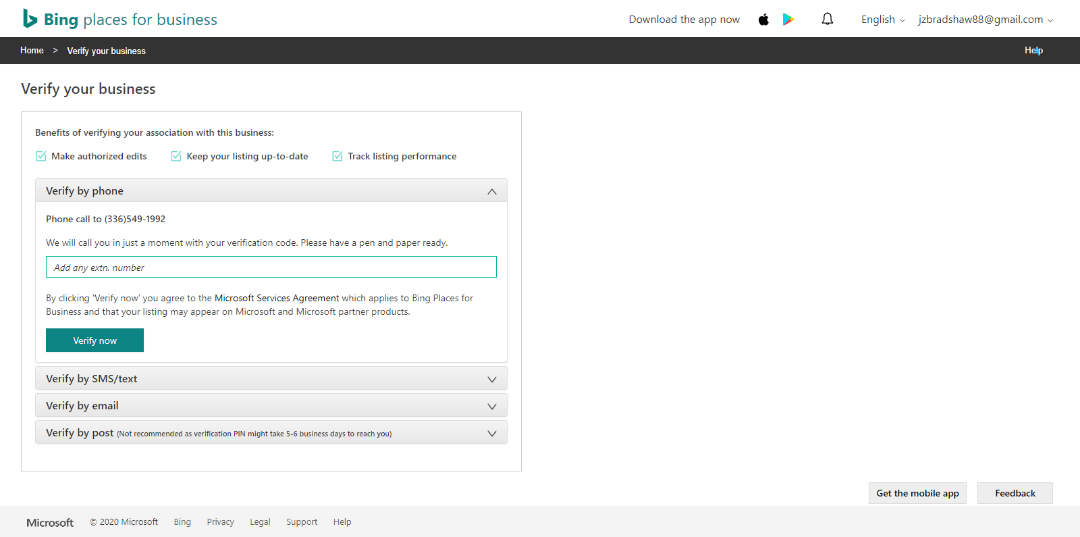 Again, your goal is to make Bing trust you. Because the listing already exists, we know they think you're a real business already. Once verified, proceed to edit your business details as if it were a new profile. If you have found multiple profiles for your business: You'll need to do a few things differently.
 Choose one listing. Record the URL via the "Share" button. Then you can repeat the search and choose another. Alternatively, Bing will let you add multiple map pins to the same map.
  However you do it, record all duplicates. From there, removal is simple. Scroll to the bottom of each listing's knowledge panel. This time choose the "Suggest an edit" link.
 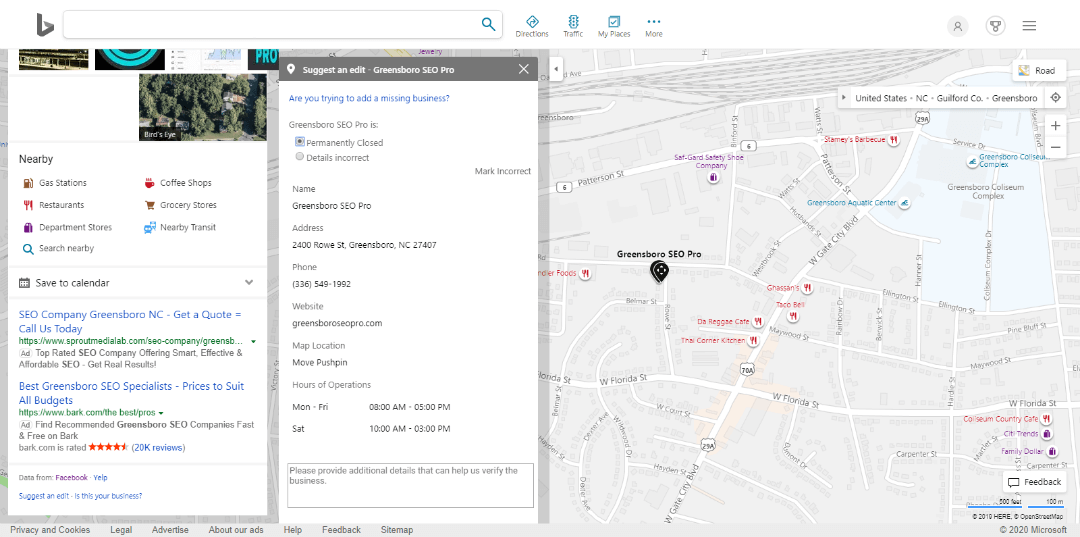 To maximize approval: We always add a little message that points to your main listing. When we do this, we typically see duplicates removed by our first follow up, 2-4 weeks later. Once you get it right, you'll have no ambiguity in your knowledge panel results on organic Bing search.
 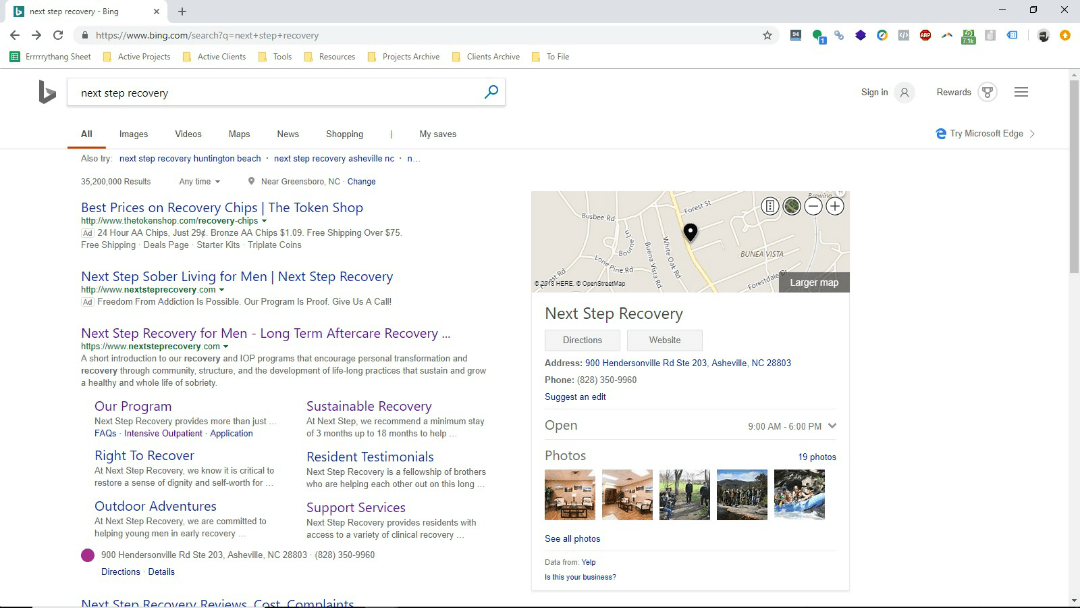 Compared to most citation sources: Removing duplicates in Bing Maps is easy. Even if it wasn't, we'd still get the job done. Local directory consistency is crucial to local SEO. If you want to show up on page one of Google (and Bing) optimize your business on Bing. Need more help claiming and optimizing your Bing listing? Leave your questions or comments below. We'll answer 'em all. Plus, we have more in store for this and our other local SEO citations posts down the road. In the meantime, you might also be able to pick up some hints by taking a look at our
 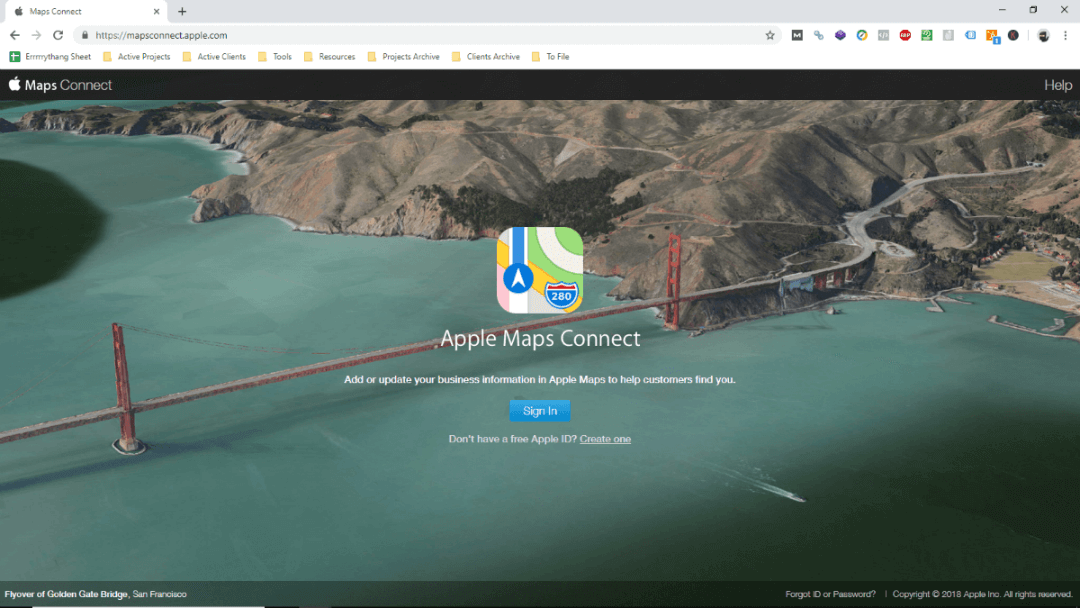 Login and search for your business. If you don't have an Apple ID, you must create one. For those that already have one, there are positives and advantages to creating a separate one for your business.
 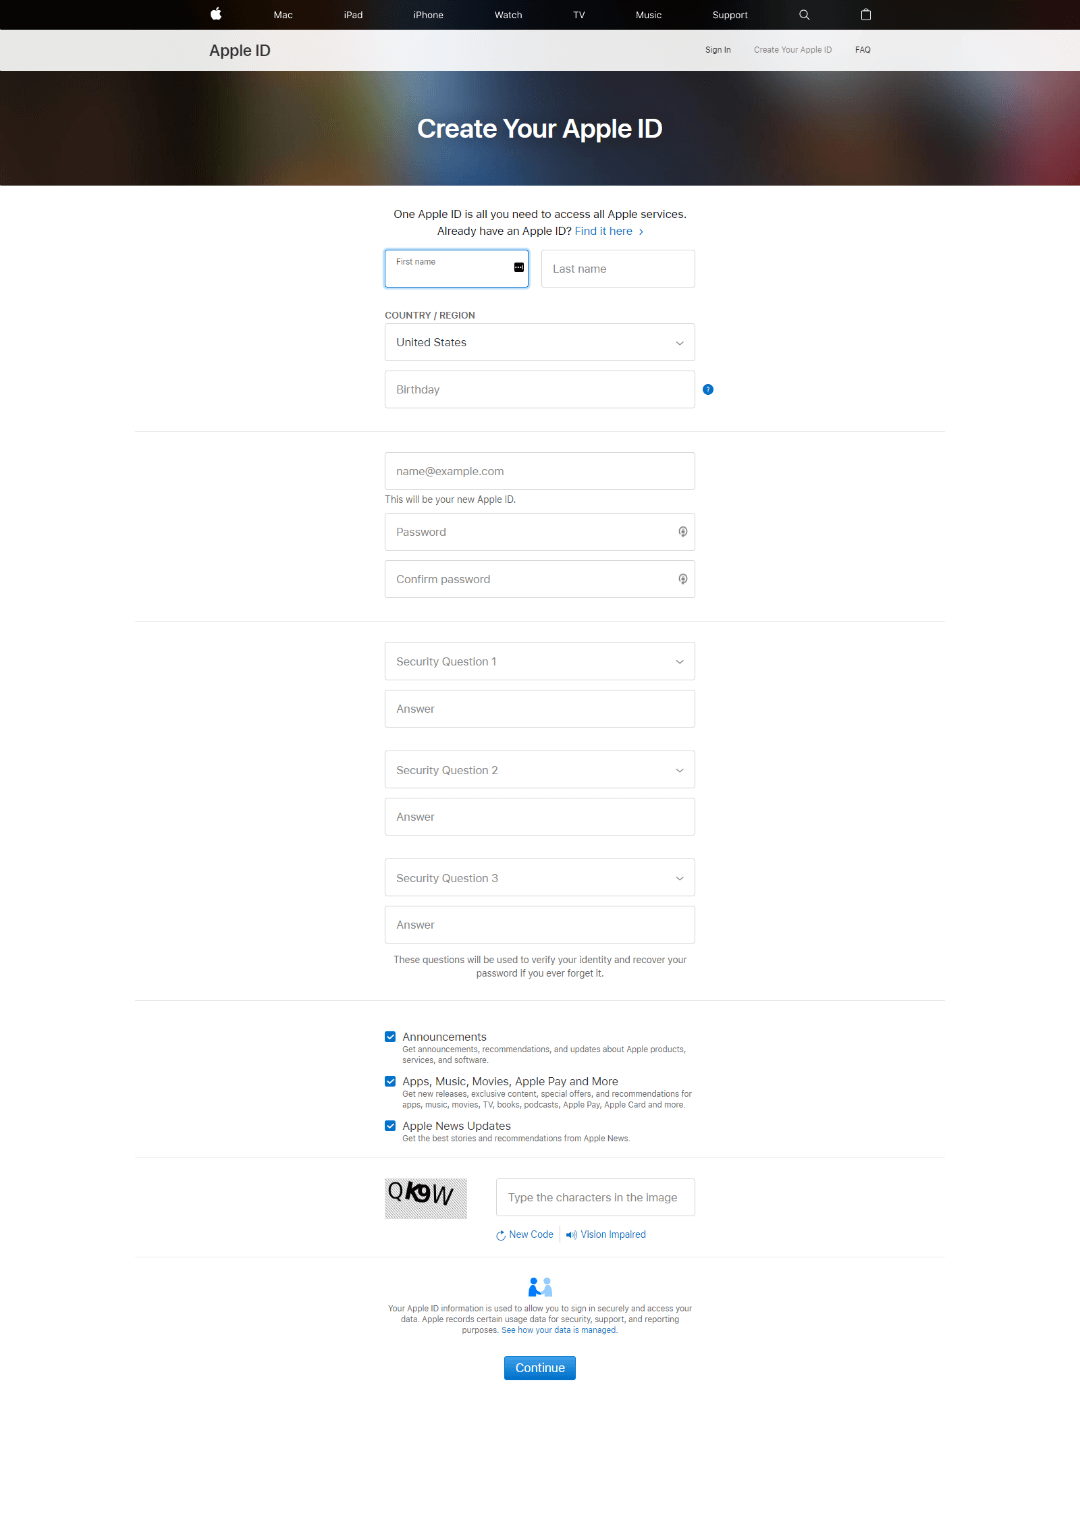 It's easier to just login and get started under your personal ID. But having a separate one for your business allows you to delegate responsibilities without putting your own Apple account at risk. If you use a branded email (ie. yourname@yourwebsite.com), your profile may get approved more quickly as well. Via
 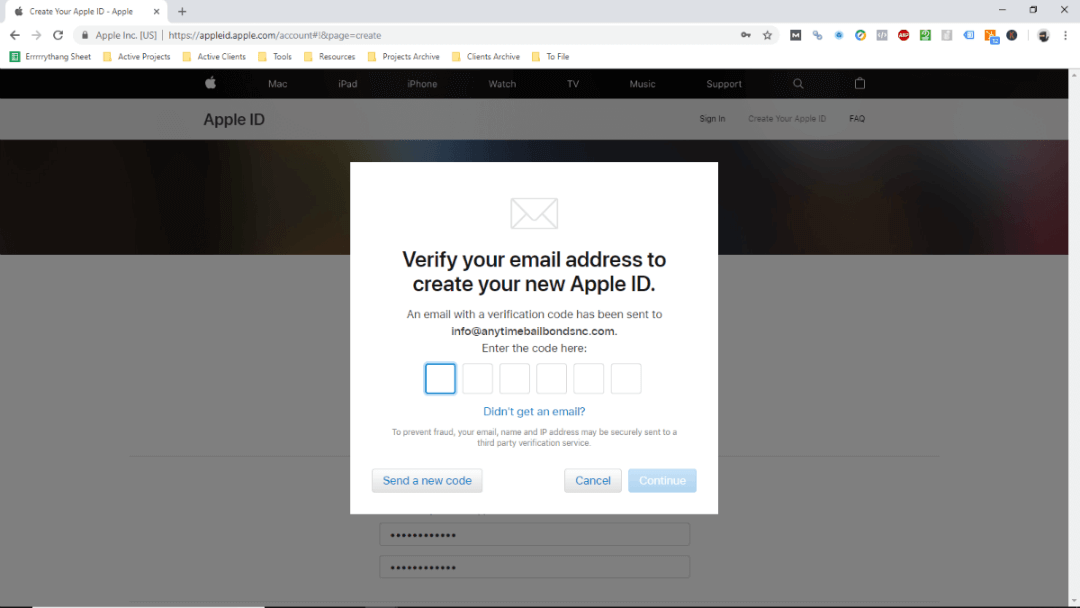 Once you're in, it should prompt you to search for your business.
 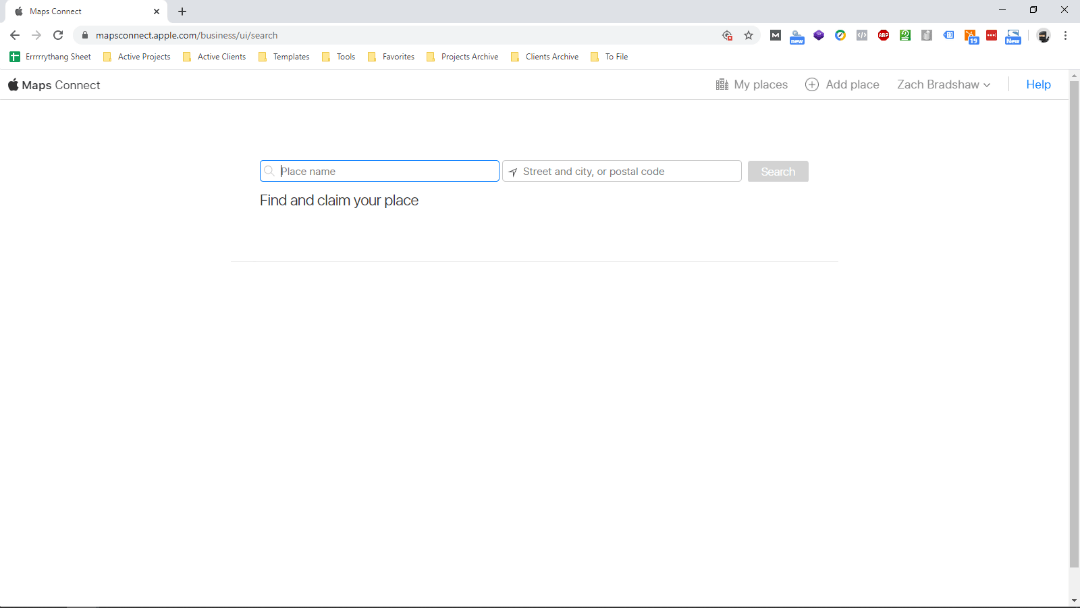 If it does not, you can
 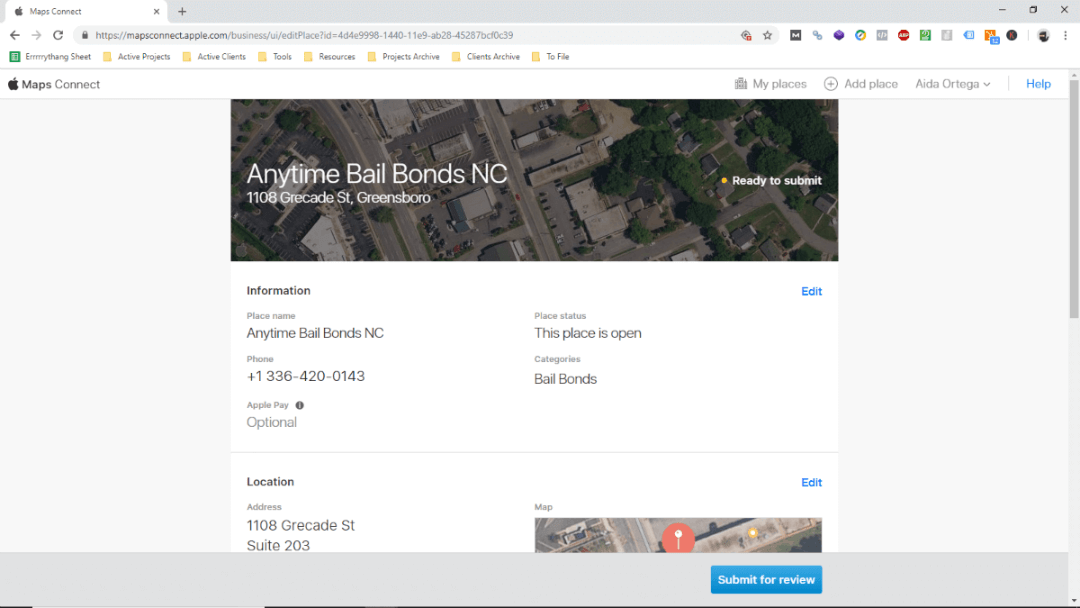 Double check all your info then click the "Submit for review" button. Profile activation does not begin until you do.
 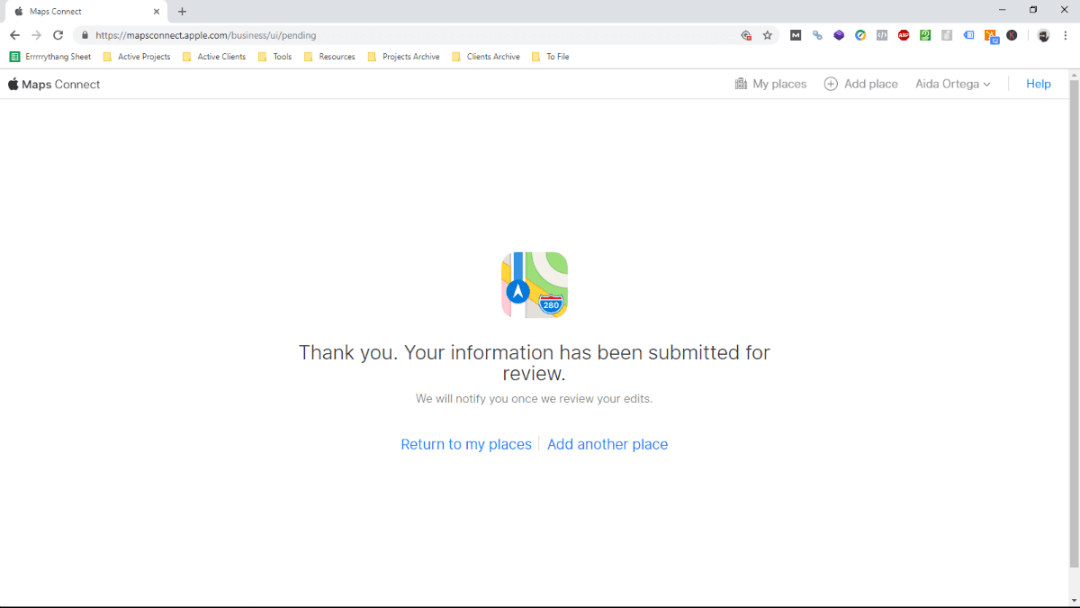 Most new profiles are asked to verify their business with a call. This completes the claim process and may have some bearing on how fast your business goes live on Apple Maps. It's the typical phone verification you can expect with most top tier directories.
 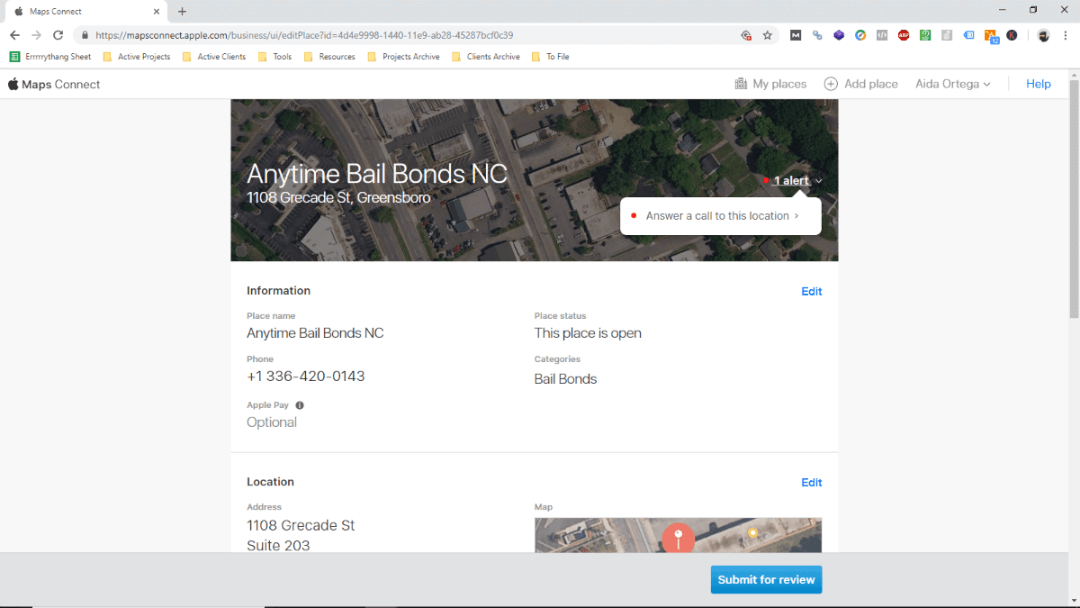 Answer the phone. Get the code. Enter the code. Click "Done."
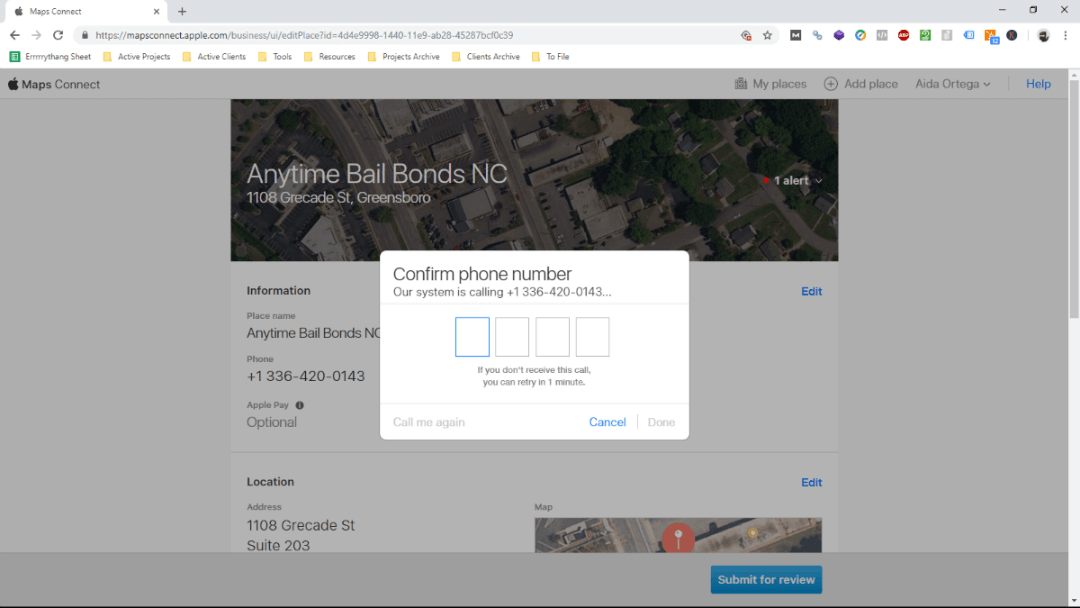 Sometimes, Apple requires further confirmation. Again, via
 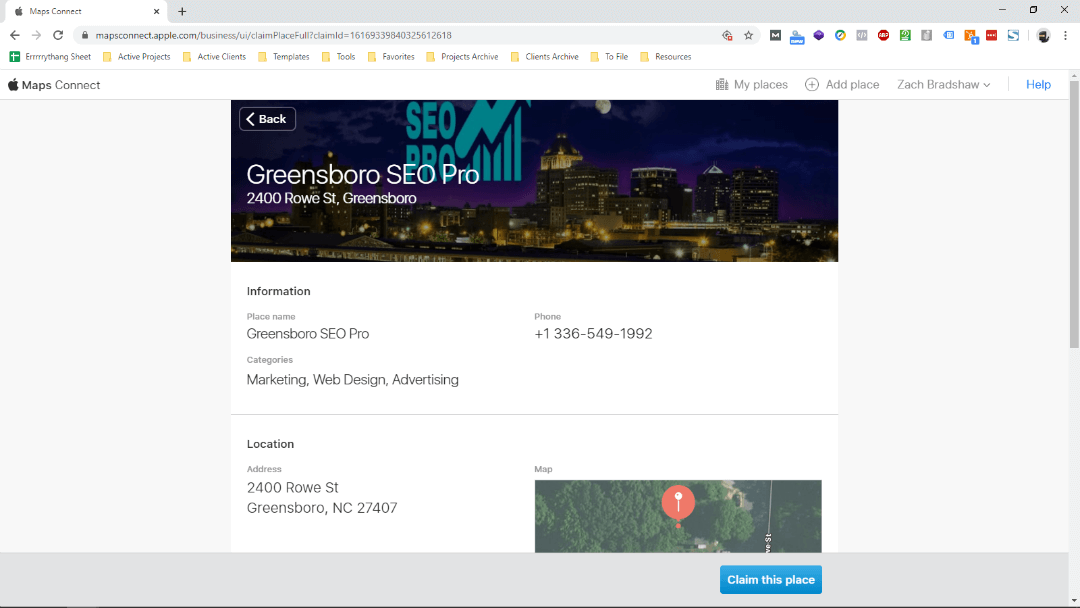 Click the "Claim this place" button. You'll get a quick call to confirm.
 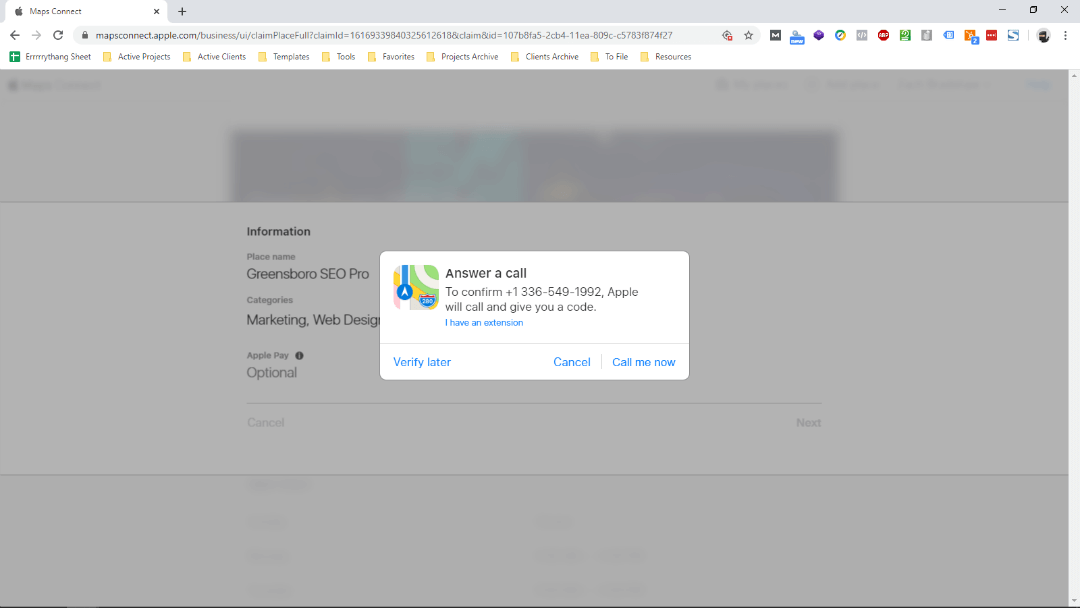 Answer the phone. Enter the code. From there, it initiates a wizard to confirm all your business information.
 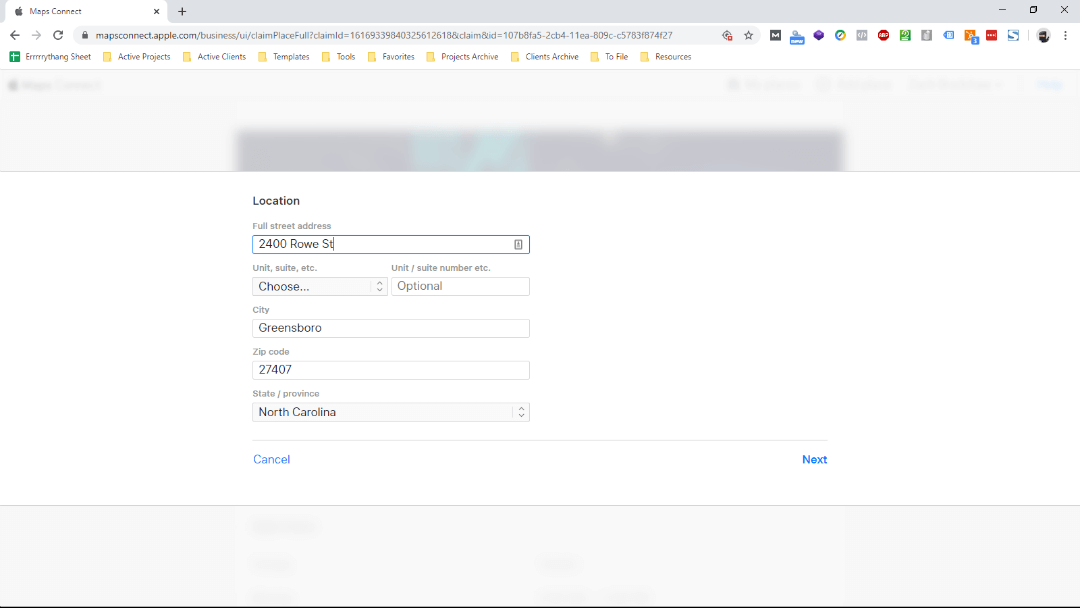 It takes you through the following: